Screen Time: We’re Asking the Wrong Question

Screen Time: A Quick History

Screen Time started to become a thing in the mid-90s and our awareness of it has taken of since then. With the prevalence of portable screens on smart phones and tables, screen time has become an important issue.

screentime

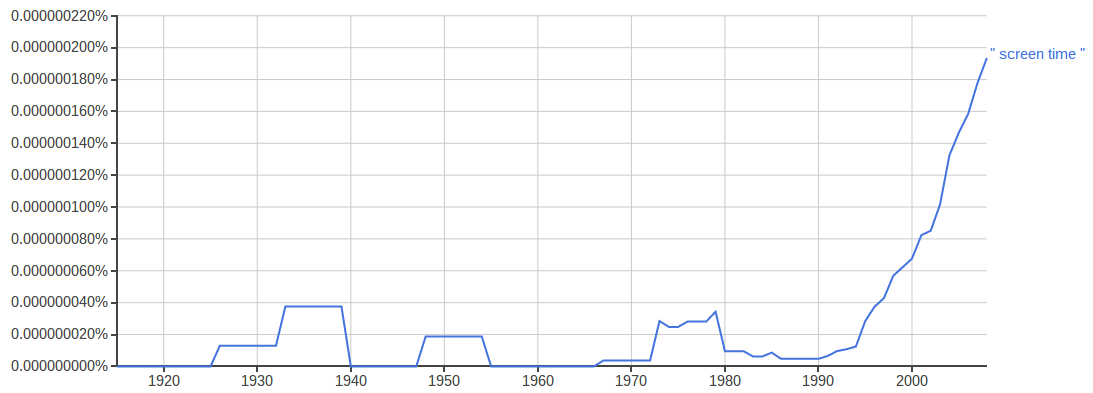
Use of the phrase “screen time” as cataloged by Google Book’s ngram viewer.

 What Does Did “Screen Time” Mean?

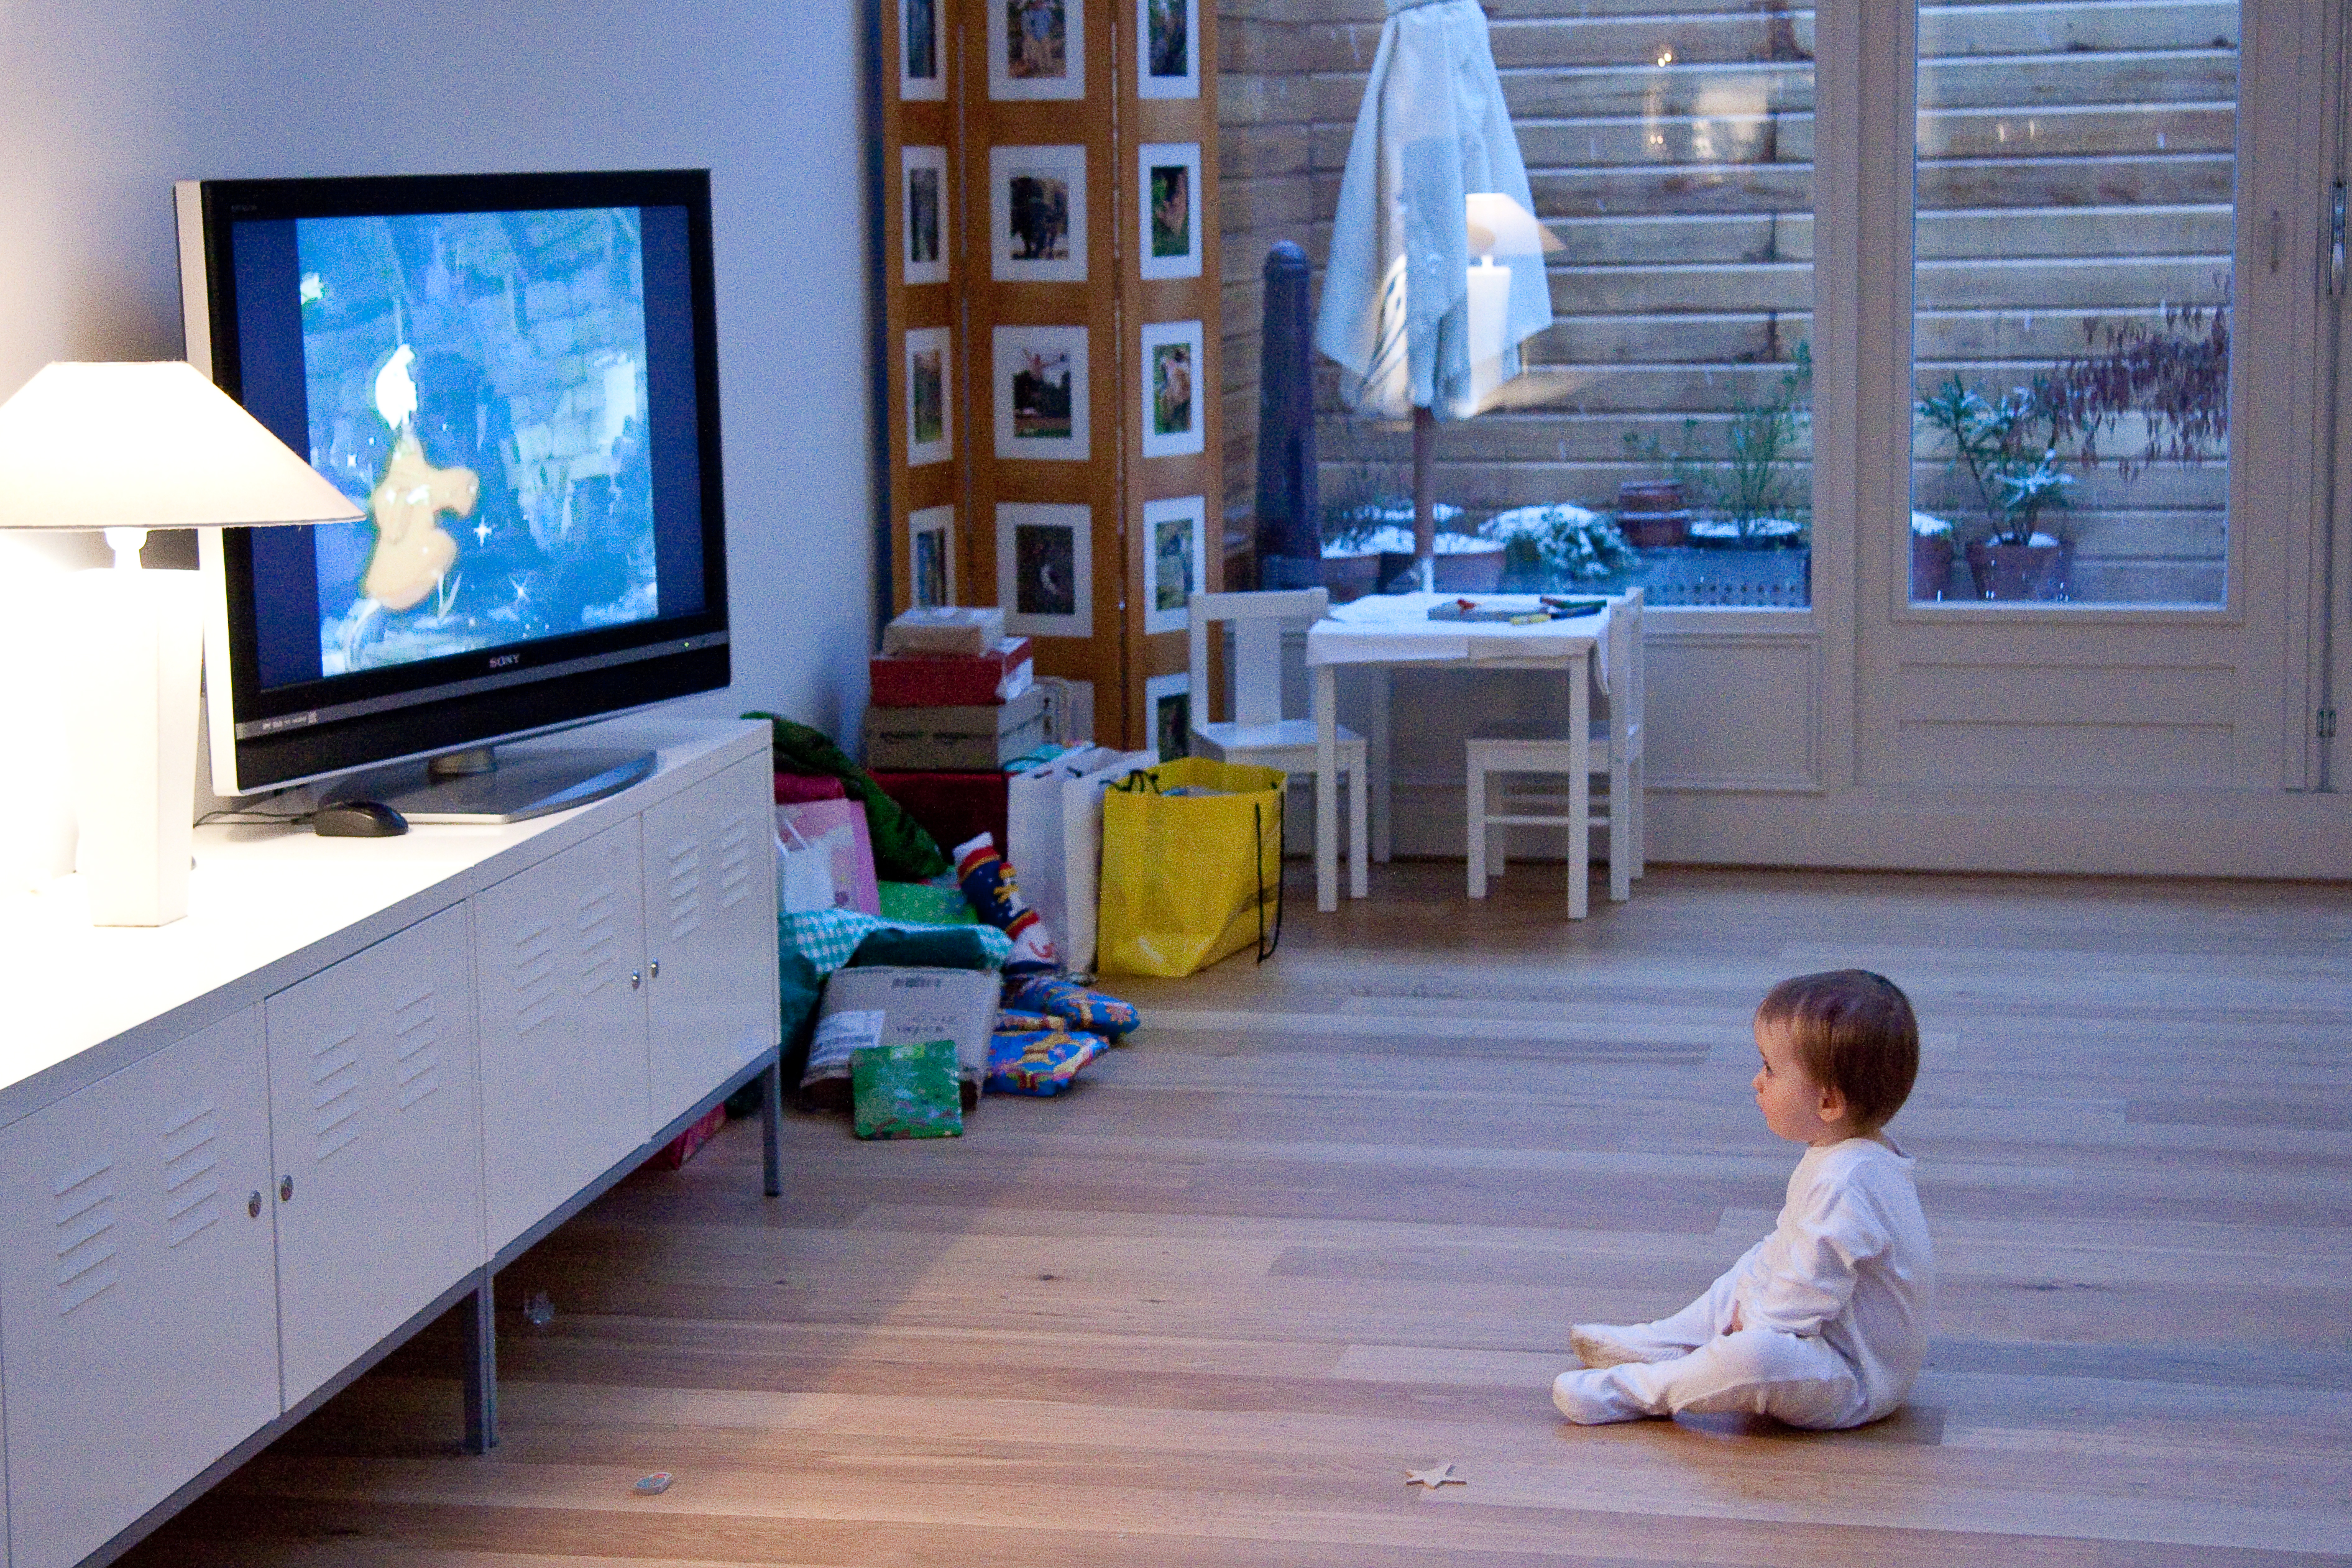
When the idea of screen time started to take off 20 years ago it’s important to remember what screens were like back then. Screens were mostly passive, and they were a consumption activity. Screen time meant watching TV, watching a movie, or paying a video game. It was the early days of the internet when being online meant consuming someone else’s content. Screens were not a creative space.

What Does “Screen Time” Mean Now?

babyscreenScreens have changed though. First, screens are much smaller and more portable; we carry them with us everywhere. This makes the screen time conversation that much more important. But, there is a second way screens have changed, and this is important. Screens, and screen time, no longer just support consumption; screens now support creation.

The Right Question Is: What Kind of Screen Time is it?

Screens do so much more today. Because of this, we can no longer lump all screen time into the same category. Passively watching cat videos on YouTube and actively taking an idea from your head and turning it into a video game with Hopscotch are very different things. When we talk about screen time we have to consider whether it’s a consumption or a creation activity.

In September 2014 the Boston Globe posted this graphic.

Click to enlarge, or there’s a linear version of it here (though this version doesn’t differentiate the passive, interactive, and creative sections).

Clearly not all screen time is created equal.

More Reading

The full Boston Globe article is here. Edutopia has a nice article written by Beth Holland as well. And eSchool News has a report on some recent research here.

photo credit: Mark Kenny via photopin cc

Using iPad Restrictions to Help Students Make Better Choices

13215772563_891cbf5654_oWe have a rule in my school that if you want to photograph someone with your iPad you must get their permission first. It’s an important rule, but sometimes students break it. This raises an interesting question: if a student is using the iPad inappropriately, should we take the iPad away from them? Since we’re 1:1 with iPads, taking a student’s device away can have ripples of impact.

On the surface, it seems like taking the iPad away makes sense. If a student uses a tool inappropriately, take the tool away. But the iPad isn’t just a tool, it’s a toolbox full of tools. So if a student abuses a tool (such as the camera), is there a way we can take away just that tool? Yes, using iPad Restrictions.

iPad Restrictions

Restrictions allow us (with a password) to enable/disable certain tools in the iPad toolbox. In Burlington, we have some restrictions automatically pushed to every device (for example, we disable FaceTime and the iTunes Store and restrict ratings for videos).

IMG_0101 (1) - Edited

Standard elementary student restrictions.

IMG_0102 - Edited

Standard elementary student restrictions.

In addition, for individual students we can add additional specific restrictions. The iPad is a powerful device because it does so much, and I am certainly in favor of having as few restrictions as reasonably and developmentally appropriate, but if a student is abusing a feature on the iPad I’d much rather disable that feature than take the entire device.

Setting Up Restrictions

In the Settings app, go to General -> Restrictions. Select “Enable Restrictions.” It will ask you to set a passcode. Make sure you remember it. When I set it for kids, I write it down somewhere. From here you can disable features on an individual basis. If a student is abusing the camera, turn just the camera off for a day or so. If a student is downloading apps they shouldn’t, disable Installing Apps. If a student is hanging out on Safari when they should be doing other work, turn Safari off (and get rid of any other browsers they have).

Since these restrictions can be set at the classroom level, you can turn them back on whenever you need to.

Finally

For kids to learn appropriate use it’s important to give them a chance to make mistakes; let’s not over-restrict their iPad experience. But if they make a mistake, let’s deal with that mistake specifically by addressing the specific tool, not the entire toolbox.

lock photo credit: Locked via photopin (license)

Printing Multiple Pictures to a Page, on a Chromebook

We’ve gone from Windows PCs to Chromebooks at my school and for the most part the transition was easy. Most of what we were doing was web-based anyway so being confined to Chrome was no problem. And being able to install apps from the Chrome Web Store and not needing an administrator’s password was an added bonus.

This missing piece for many teachers was being able to print multiple images on a single page (easily). Sure, you can manually insert them in a Google Doc, but it’s not a great solution, especially if you have a bunch of them. In Windows or on a Mac you can print 3, 4, 6, 9 pictures to a page very easily from the Print Pictures dialog box (Windows) or Preview (Mac OSX). Chromebooks just don’t seem to do this. I don’t like doing a lot of printing, but in a elementary school sometimes you need pictures of all your students for things like holiday/Mother’s Day/Father’s Day gifts.

A search of the Chrome forums revealed similar issues. There just isn’t an app or extension that will do it. But online2pdf.com seems to do the trick.

To print multiple images on a single page, head over to online2pdf.com and find the “Select files” button at the bottom.

select files

Click Select Files and you’ll be prompted to upload your pics. Once you upload them (you’re limited to 20 at a time), you’ll see this screen verifying the images you’ve selected. Don’t convert them yet; click the “Image-to-PDF” tab at the bottom first.

image to pdf

In the “Images per page” section, select the the number of image per page. One per page will give you pictures that are about 8×10, two per page is about 5×7, four per page is about 3×5. Then click “Convert” at the bottom.

convert

As it generates your PDF, you’ll get a progress screen.

waiting

When done, your PDF will automitally start downloading. If for some reason it doesn’t, there’s a link to manually start the download. Once downloaded, you can open and print the PDF directly from your Chromebook. It will look like the prints you’re used to on a Windows or Mac machine. If you uncheck the “Fit to page” checkbox when printing the pictures will print a little bigger.


TIP: It seems to work better if all your images are portrait orientation or all landscape. If you have both, I’d run two batches – one of your portrait pictures and one of your landscape pictures. Onlie2PDF won’t rotate them for you and they’ll crop weird.

SAFETY: The FAQ (Frequently Asked Questions) page notes that, “all files and data are treated as strictly confidential, of course. Your files are only temporarily stored on the server of Online2PDF, after the conversion they will be deleted immediately.” This meshes with what I can see from the outside. The link to manually download your PDF stops working after a minute.

filenotfound


I hope this helps.

Who Says Kindergartners Can’t Code?

IMG_7347Hour of Code week started today. As an elementary Technology Integration Specialist, I know I want my students exposed to programming. The questions is, how low do I go? This year, I went all the way down to kindergarten.

Given the potentially short attention span of kindergartners, I shortened the Hour of Code to 45 Minutes of Code. I loaded the free Lightbot: Code Hour app onto a cart of iPads and headed down to the kindergarten wing. I like the Lightbot app a lot becuase the coding blocks are all symbols. For my younger kindergartners who are still learning to read, this levels the playing field. (This also makes Lightbot a great intro-to-coding app for my ELL students.)

I started the IMG_0397
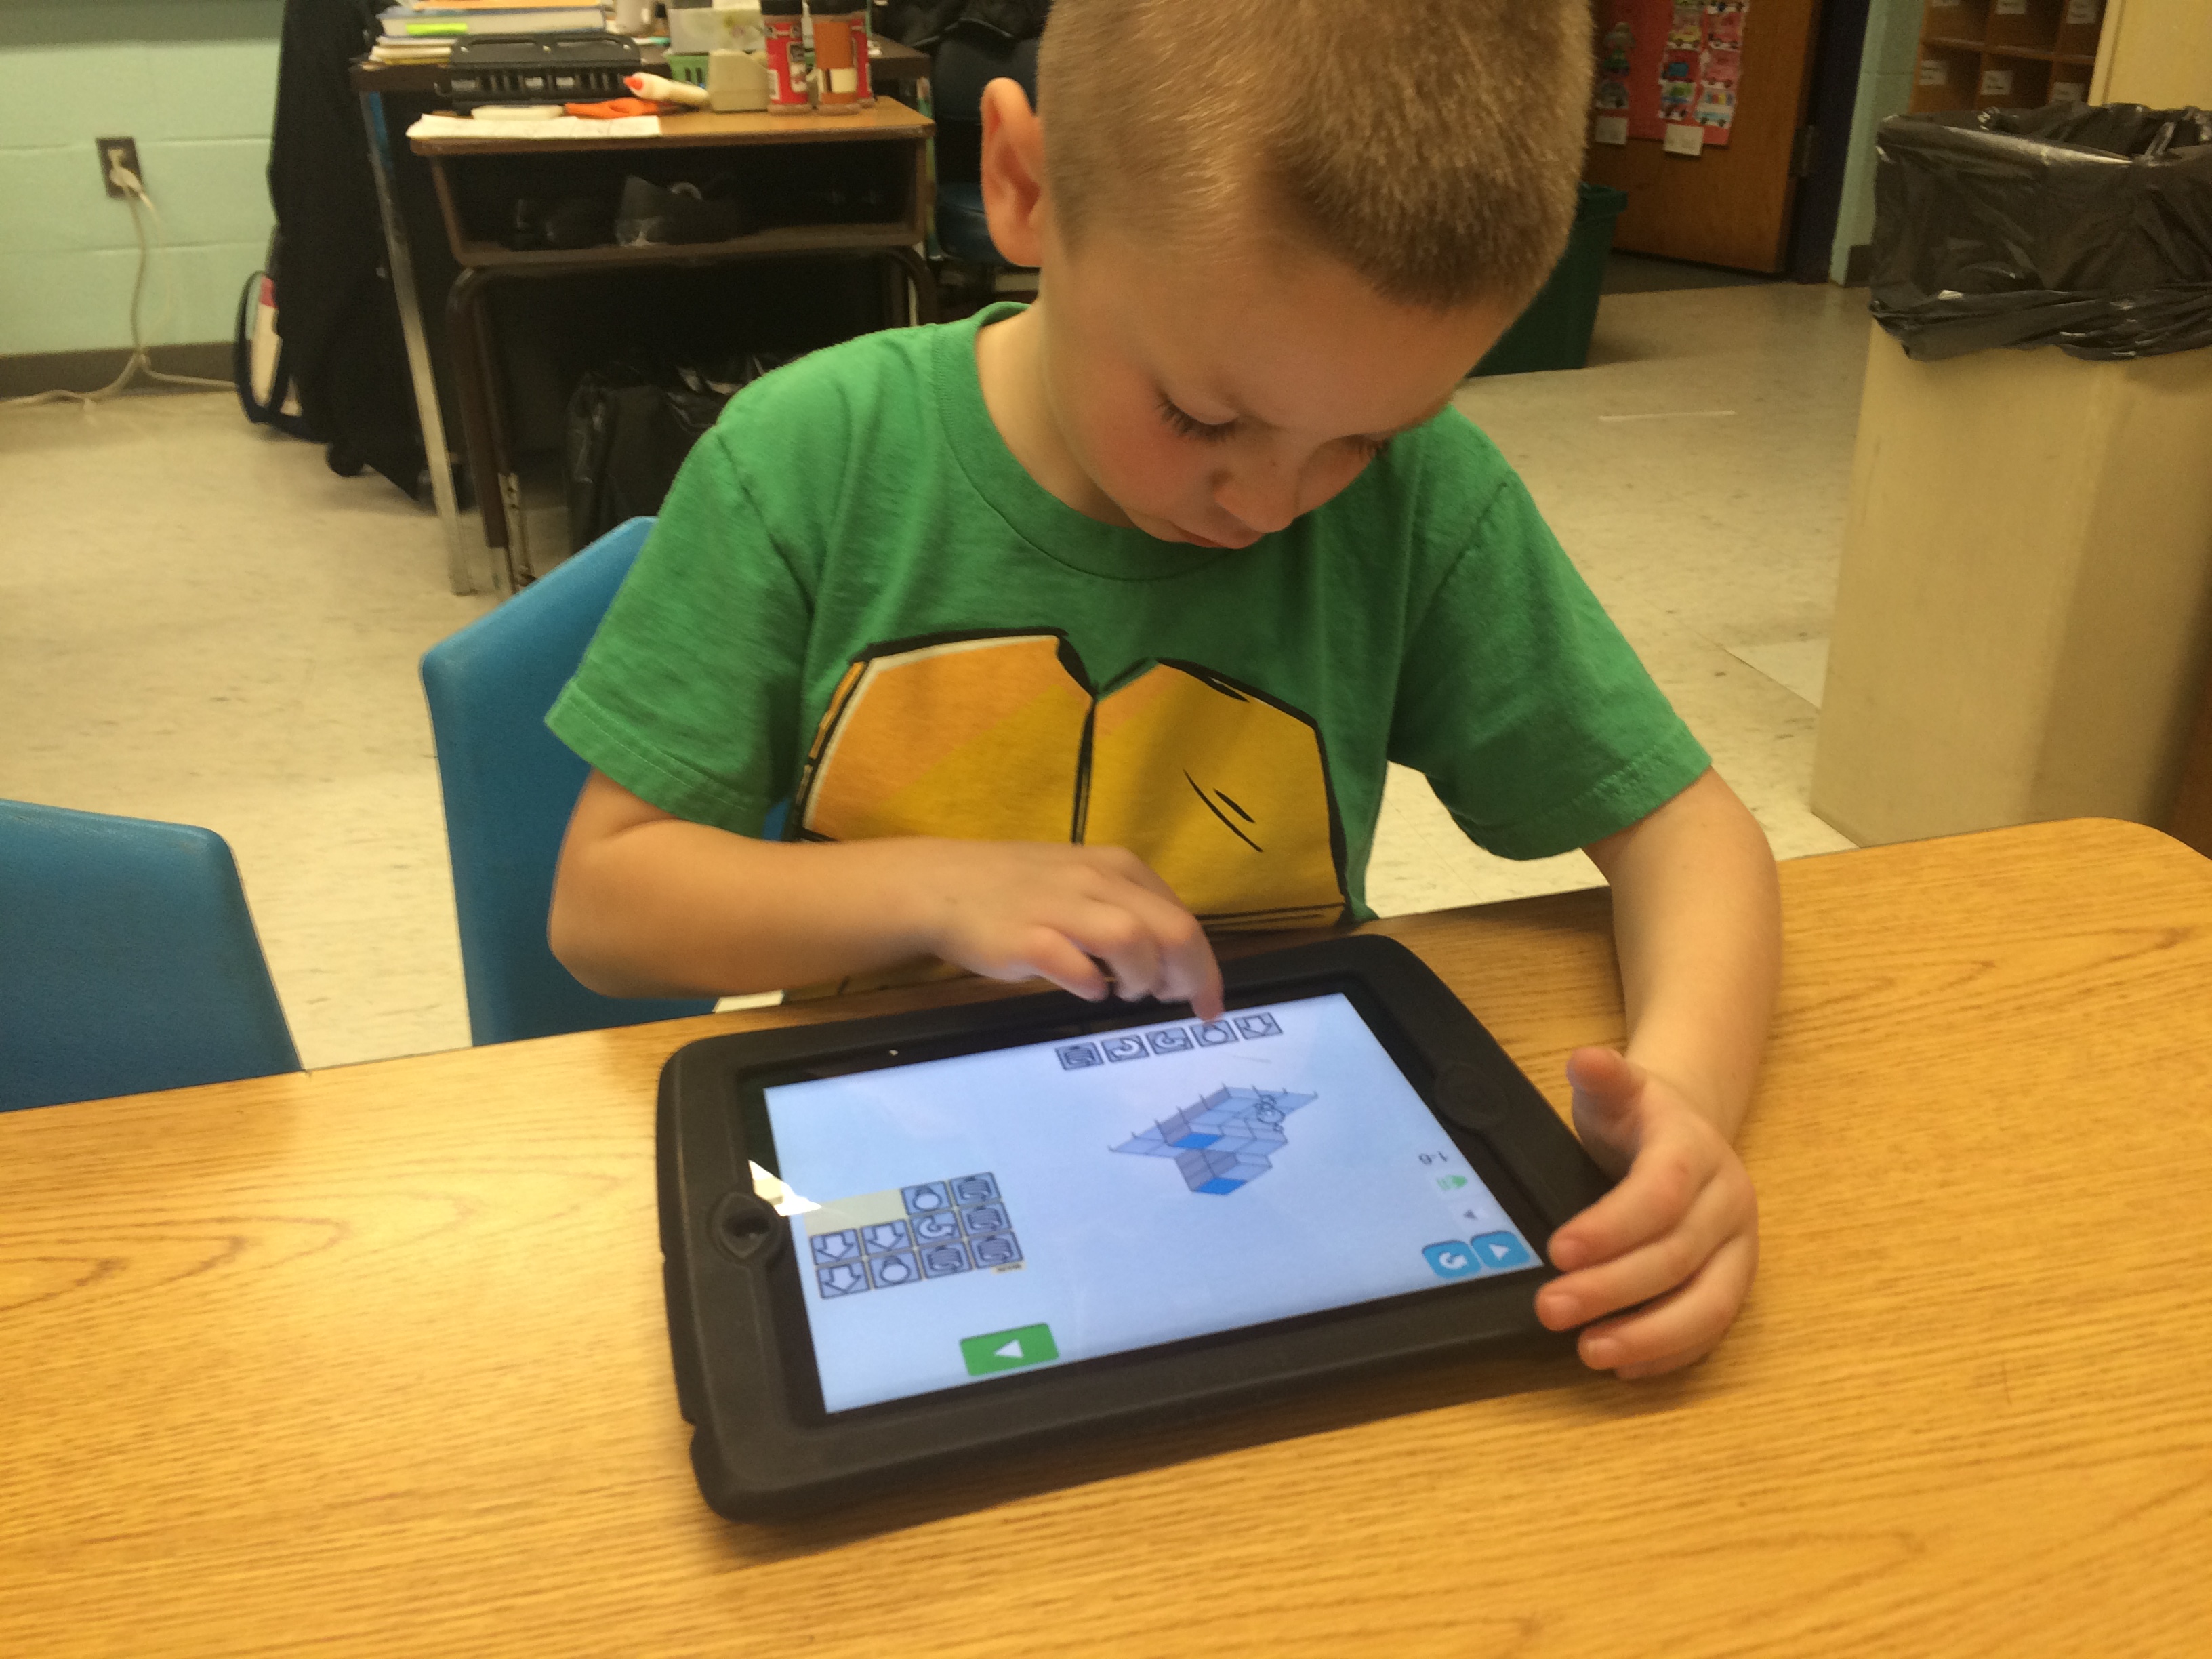
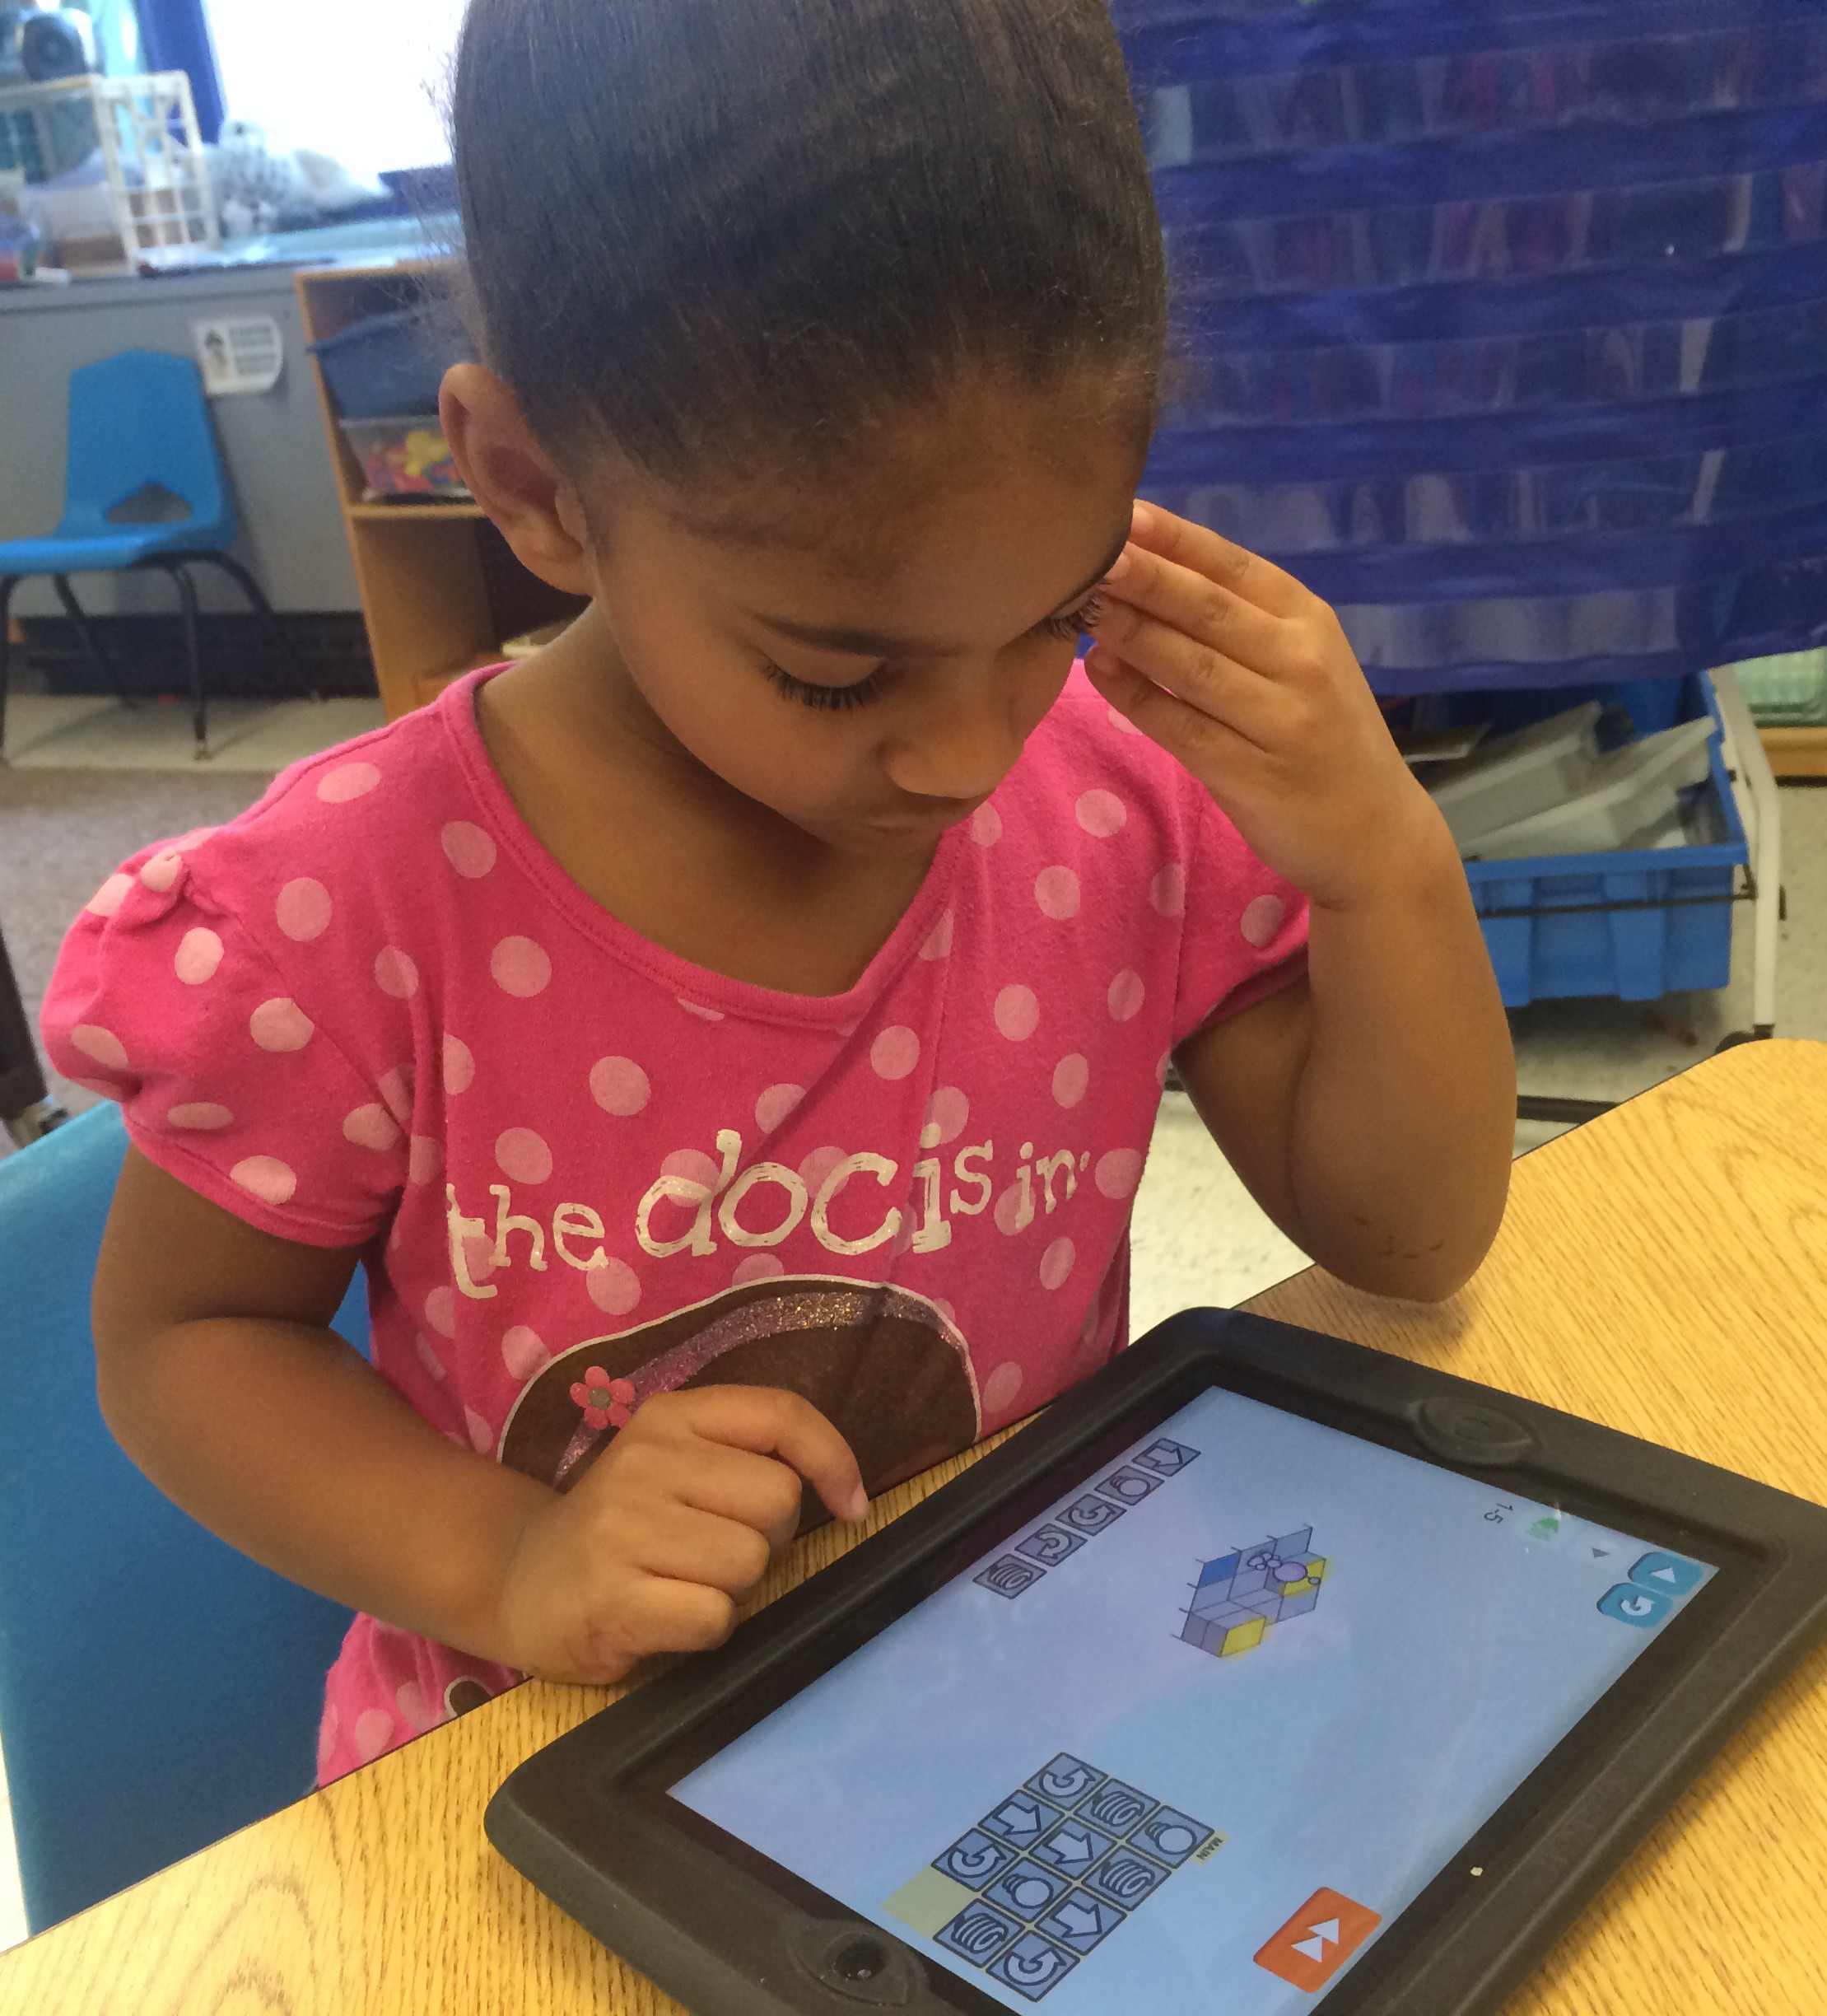
lesson talking about computers in general. In addition to being in things like laptops and iPads, they are in phones, microwaves, coffee makers, traffic lights, etc. Computers are, literally, all around us. Because of that, it’s important to have some idea of how they work, how to make them do what we want them to do. That conversation brought us to Lightbot.

IMG_0398We completed the first four challenges in Lightbot together, up on the projector screen. We explored the command blocks and what they did. We made some mistakes (turning is a particularly tricky concept for 5-year-olds to master) and learned from them – which is exactly what I wanted to have happen. Then I turned them loose on Lighbot on their own.

I asked the kids to start by going back and doing the 4 challenges we did together, on their own. Some moved through those challenges quickly, others took more time. Ultimately, they progressed further in the app than we had gone as a whole group – completing tasks they never saw with me. And at the end of my 45 minute block (with about 25 minutes of them coding on their own) we cleaned up. Or tried to; the problem was that the kids weren’t ready. They were totally engaged. They were getting stuck, and having to work through mistakes, but at no point did anyone say, “I don’t want to do this anymore.” When my 45 Minutes of Coding ended, they wanted to keep coding.

IMG_7349They did a great job, and I’m excited to put iPads back in those rooms with Lightbot still loaded. Maybe it can become a center for them. The computational and positional thinking that are involved are great. And no matter what anyone says, kindergartners can code.

Lack of Tech PD Isn’t the Problem

It’s so easy to do. We inject technology into classrooms and schools and offer lots of professional development. Time goes by; in some classes it takes, and in other rooms tech integration still struggles. We hear the teachers cry, “we need more tech PD” and we scramble trying to figure out what we missed and how we can create more effective professional development.

IMG_4310But maybe more tech PD isn’t the solution. Or maybe you’ve already offered more tech PD and things haven’t really gotten better. That’s because it’s not a technology problem.

It happens all the time: we put technology into a classroom, things don’t go as planned, and we blame the technology. That must be it, right? Not necessarily. At what point does it stop being a technology problem and start becoming a classroom management problem.

Teaching strategies from 20, 10, even 5 years ago may no longer work. Our students are different, our strategies must change in response. If you take a room with poor classroom management and introduce an educationally disruptive and potentially addictive device, what do you expect to happen? Of course it won’t go well. But that’s not a technology problem, and because of that all the technology PD in the world won’t fix it.

So what do we do?

We need administrators (evaluators) to help out. They need to work with teachers to refine their classroom management skills. If teachers struggle with teaching reading or math we know how to have those difficult conversations about improving. But too often we seem to look the other way when it comes to classroom management, even though it transcends every lesson we teach! We say to ourselves, “everyone is different,” “everyone has their own style.” Yes, that’s true, but some styles are ineffective. And those styles need to change. We’re not doing our students any favors by overlooking these rooms.

If technology integration, if 1:1 environments, are going to be successful we need classrooms with strong classroom management skills. Period.

My district emphasizes the importance of engaging lessons; I agree that’s extremely important to what we do. But engaging technology-filled lessons with poor classroom management will lead to failure every time. And not because the teachers need more tech PD. If we’re going to solve this problem, we need to address the root causes.

photo credit: source via photopin (license)

Starting an Elementary Student Helpdesk

Last year (2014-2015) Kim Lynch (a 5th grade teacher) and I started a Student Helpdesk at our elementary school. The idea was to have a group of trained students who could help with tech-related issues in the building. Here’s how the Helpdesk came to be, and how I hope it will change in the future:

The Vision

Helpdesk working in first grade.

Helpdesk students working in first grade.

The vision was to have a group of students who could help teachers, or other students, or even whole classes when they needed a hand with technology. This could mean them joining me working in a classroom, or they could work without me if I was already teaching in another room.

Since elementary students don’t have study hall, or unscheduled, time this would mean taking them out of class to help out. It was always made clear to teachers that if I wanted to borrow a Helpdesk student from their class, I would seek their permission first. Helpdesk was not meant to be a ticket to get out of class. Each time I would make sure each student was okay academically before taking them. (That said, I definitely believe that when a student helps another student or classroom learn a technological skill, the teaching students learns some valuable skills as well.)

Tech Skills

Since our district is 1:1 with iPads, our skill list is pretty iPad-centric. I developed the list and grouped the skills into categories (most of them correspond to the district’s Foundational Apps). Students came to the computer lab during their recess time to practice the skills, and help each other master them. When they felt they had mastered a category, they would sit with me 1:1 and show me that they could do everything on the list. I kept a running list of who had mastered which apps, so if I needed help with iMovie or Book Creator or Google Drive I could quickly see which students had mastered which apps (and who would be a good student to help out).

On missing recess: Coming to Helpdesk was never required. If it was a nice, sunny day after a week of rain it was fine if kids wanted to be outside. Interestingly (but not entirely surprising), if you look at recess as free time or a way for kids to recharge mid-day, most of the Helpdesk students were just as happy to recharge by learning a new app on the iPad than running around outside. Most mornings I was greeted with, “can we come down at recess today?”

Students

In it’s first year, we hand picked about a dozen fifth graders. Most were boys, which initially we were uncomfortable with. But the more we looked at the specific makeup of that year’s 5th grade class, we felt better about it – it was a group that really didn’t have a lot of tech-interested girls. Looking at the class we had the year before, it would have been a more evenly balanced group simply because it would have been a different population to choose from.

Moving Forward

Changes for the upcoming year:

  • I want to develop an application process. I want a questionnaire so students can tell my why they think they’re a good fit for the Helpdesk (Why do you want to be a part of the Helpdesk? Are you willing to give up recess time? How do you feel about helping younger students or teachers? If you miss work in class, are you willing to make it up on your own, possibly as homework?). I don’t want to hand pick the team again.
  • I want to open it up to both 4th and 5th graders. The idea here being in subsequent years I’ll have a crop of kids in the fall who are already trained (trained as 4th graders, now starting 5th grade). They might be able to help train the new students (if their recesses overlap), but more so we’ll be able to start helping classes as soon as the school year starts.

I’m looking forward to a new and better Student Helpdesk this year.

Looking for 1:1 Success? You Need Ubiquity!

ipad_paper
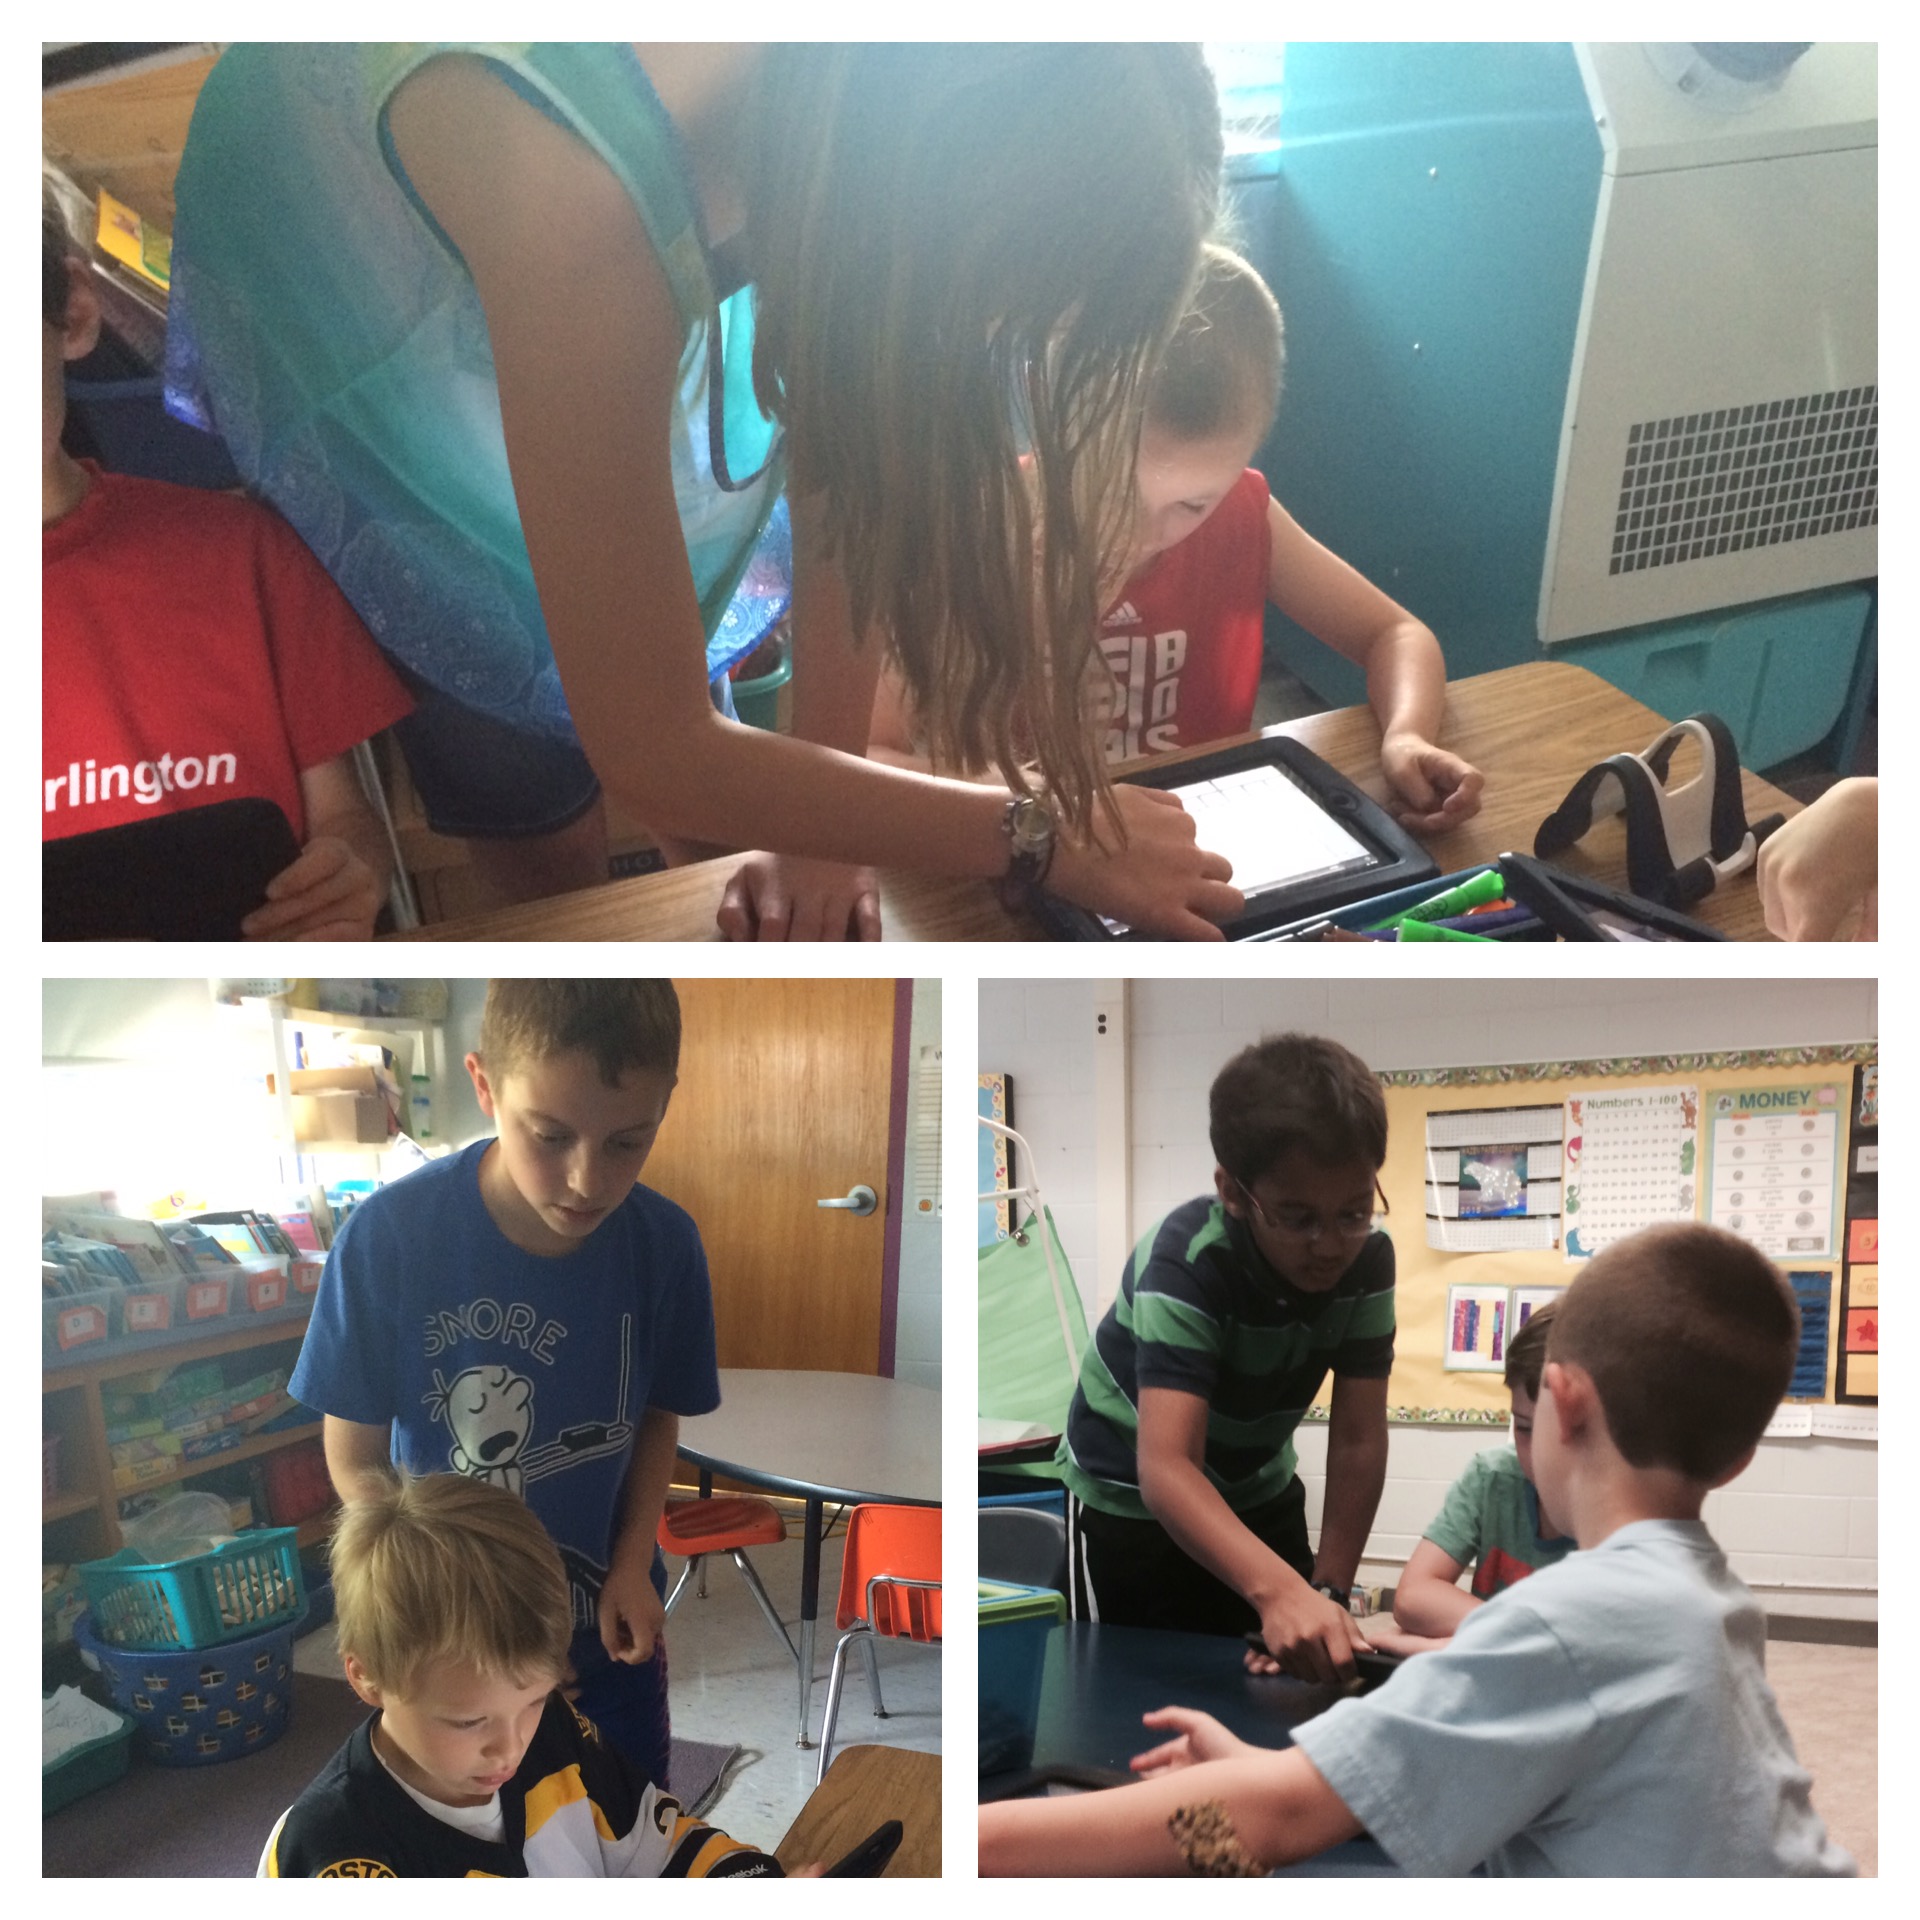
There are lots of things that will make a 1:1 environment (iPads, Chromebooks, laptops, BYOD, etc.) successful, but without ubiquity you won’t find success. If you’re going to go 1:1 technology can’t be an extra thing, it has to permeate everything.

Think about it like this, the iPad is an educational tool. You wouldn’t hide your constructions paper or scissors or makers away and only get them out for special projects (I hope). If you do, that Social Studies project starts to become a construction paper and scissors project; the project becomes about the tool not the content.

The same is true for technology. If you keep it away and only get it out for a limited number of specific activities, that Science project starts to become a technology project.

If you want students to use technology effectively they need lots of practice. If they’re working in a content area you want them focusing their energy on the content, not how to use the tool (technology).

Sure, there are times when you want to unplug. I’m not suggesting that we go all-technology all-the-time, but if you want success the tool needs to be available as much as possible – like all their other school supplies/tools (construction paper, scissors, markers).

Creating a Google Custom Search Engine

Teaching students how to search effectively is essential. But letting an elementary student loose on Google makes a lot of people nervous (which is okay). School filters are good, but they aren’t perfect (which is also okay, but that’s another post altogether). A Google Custom Search Engine is a great compromise. It allows students to use the Google search engine, but it also allows you to limit the webpages and websites that are used for the results. And best of all, creating a Custom Search Engine is easy.

First, head over to www.google.com/cse.

Look for the blue botton that says, “Create custom search engine.”

Screenshot 2015-01-08 at 10.39.58 AM

If you’re not logged into a Google account, the blue button will ask you to sign in first.

Second, you need to add the websites you want your Custom Search Engine to use. Every time you add a new site, an additional box will appear for you to add another. In my example I’ve added some sites with good information on planets.

Screenshot 2015-01-08 at 10.43.24 AM

Next, you name the search engine.

Screenshot 2015-01-08 at 10.43.40 AM

Finally, find the blue “Create” button.

That’s it! It’s ready to go. You just need to get your students to the search page.

Screenshot 2015-01-08 at 10.44.34 AM

Here Google gives you three options – you can:

  1. Get code – if you want to embed your search engine in a webpage. Google will give you some javascript you can plug into a webpage.
  2. Public URL – if you want to have students navigate to your search engine. It’s a long URL so you’ll want to find a way for students to not type it all in (email it, put the link on a webpage, make a qr code, etc.)
  3. Access the Control Panel – if you want to go back and change the sites that your custom search engine uses.

When I go to the link for my Planets Custom Search Engine (the link is: https://www.google.com/cse/publicurl?cx=017140682098558138880:20oohmnfel4, I wasn’t kidding when I was long), the search page looks like this:

Screenshot 2015-01-08 at 10.46.01 AM

And when I search for neptune atmosphere I get this (only results from the sites I specified):

Screenshot 2015-01-08 at 10.47.36 AM

Note: If a student follows one of the search results, and then follows a link from within that page, they can access the rest of the web. The Custom Search Engine only limits the results of the search; it doesn’t block students from following links to other sites.

Searching is an important skill. If you can’t find what you’re looking for in the first page of your search results, you’re using the wrong search terms. But keeping our students safe while they explore this is important too.

From XKCD

Making Book Trailers Better: Legacy

iMovie-2.0-for-iOS-app-icon-smallMany teachers have used the iMovie Trailer function to make book trailers. But what do we do with them? How do we make sure those trailers last? How do we make sure students, lots of students, see those trailers? How do we make sure students use those trailers to help them choose books they’ll like (because that’s really the point of a trailer)?

QR Codes!

Okay, first, I don’t love QR codes; I know some teachers adore them. I think they have limited use, but this is definitely one of them.

Book QR Code

Our first trailer. The student chose the color.

Once you make your trailer, put it in a public place on the web. We’re a Google Apps for Education (GAFE) district, so we put them in drive and then made them public to anyone with the link. Then create a QR code for the movie (we used the QRafter app and the QRStuff site). Then head to library and put that QR code on every copy of the book. Now, when students go to the library (we’re a 1:1 iPad district) they can scan the QR code and see a visual trailer for the book created by a student (in addition to the blurb on the back). If books are going to be displayed cover-out, put a copy of the QR code on the front too.

And (this is the best part), the movie file is stored in a stable place in the cloud. So as my elementary school students who created the trailers move through middle and high school the trailer will still be sitting in their Google Drive available for younger students to see it. Five or more years from now, students will be watching the trailers we created this year!

Our students do great work; make sure it isn’t lost when summer arrives. Help them create a legacy.


Note: I’ve written about iMovie trailers before. Here is a post with single-page, printable storyboards for all the trailer themes. Here is a post about using trailers as a way for students to introduce themselves to next year’s teacher. And here is a post about moving beyond trailers and getting into iMovie projects.

#Chromebook Keyboard Shortcuts

I’m a big fan of keyboard shortcuts (the alt-tab was a game-changer for me), so when I stumbled across this in my Chromebook’s settings, my mouth dropped. It’s beautiful interactive visual of how the keyboard functionality changes with the shortcut keys.

If you hold down the Control (ctrl) key, these are the shortcuts (click to enlarge):

Screenshot 2014-09-19 at 10.54.56 AM

If you hold down the Control (ctrl) and the Shift key, these are the shortcuts (click to enlarge):

Screenshot 2014-09-19 at 10.55.36 AM

There’s an awful lot you can quickly access.

On a Chromebook, use the URL chrome://keyboardoverlay/ to access this.