No, Your Classroom Blog Should Not Be Private

lockPublic or Private?

Teachers often ask me if their classroom blogs should be private of public. It’s a good question and one that always comes from a good place: if I am going to post information about my students, is it okay if its public? Absolutely (and you’re not really posting information about your students; you posting information about the learning in your class).

And I know, people are worried about posting pictures of students. That’s okay; it’s something you should be thinking about. And you definitely need to get parent permission before you do that. These days a photo permission form is usually included in the packet of forms that goes home at the beginning of school. If your school’s photo form doesn’t include something about posting pictures online, it needs to be changed.

But even if you can’t (or don’t want to) post pictures of students, you can still have a great blog. Matt Gomez, a kindergarten teacher in N. Dallas, TX recently wrote a great post about having a successful classroom blog without using students’ pictures. Even if you plan to post pictures of your students, it’s worth taking a look at his post.

Why Public?

As educators we have blogs to communicate. To communicate with parents. To communicate with the community. To communicate with other educators. To tell our story. If we make our classroom blogs private, we can’t tell our story very well. And if we’re not telling our story someone else (the media?) certainly will tell it for us. And I am sure you will do a better job telling your story than the media will.

And that story needs to be shared. A public blog can easily be shared with cousins, aunts and uncles, and grandparents.

Still a Little Uneasy About a Public Blog?

Making an unlisted blog in Blogger.

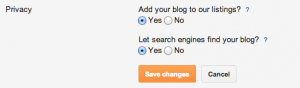
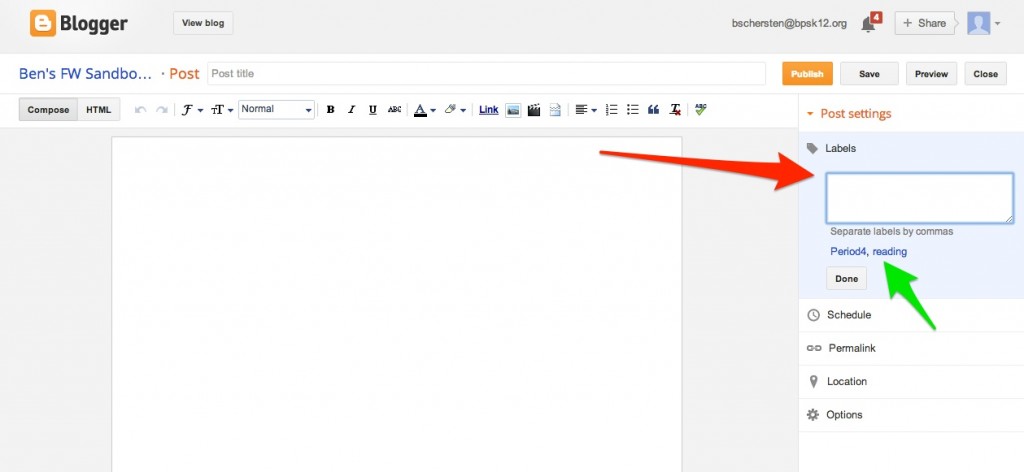
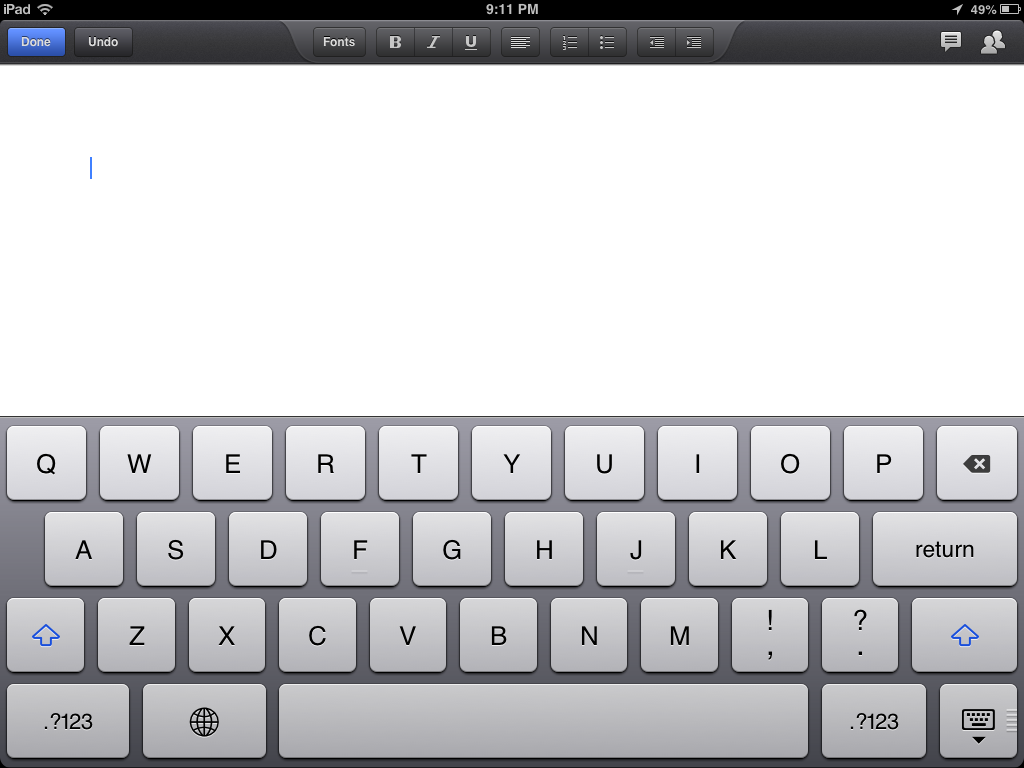
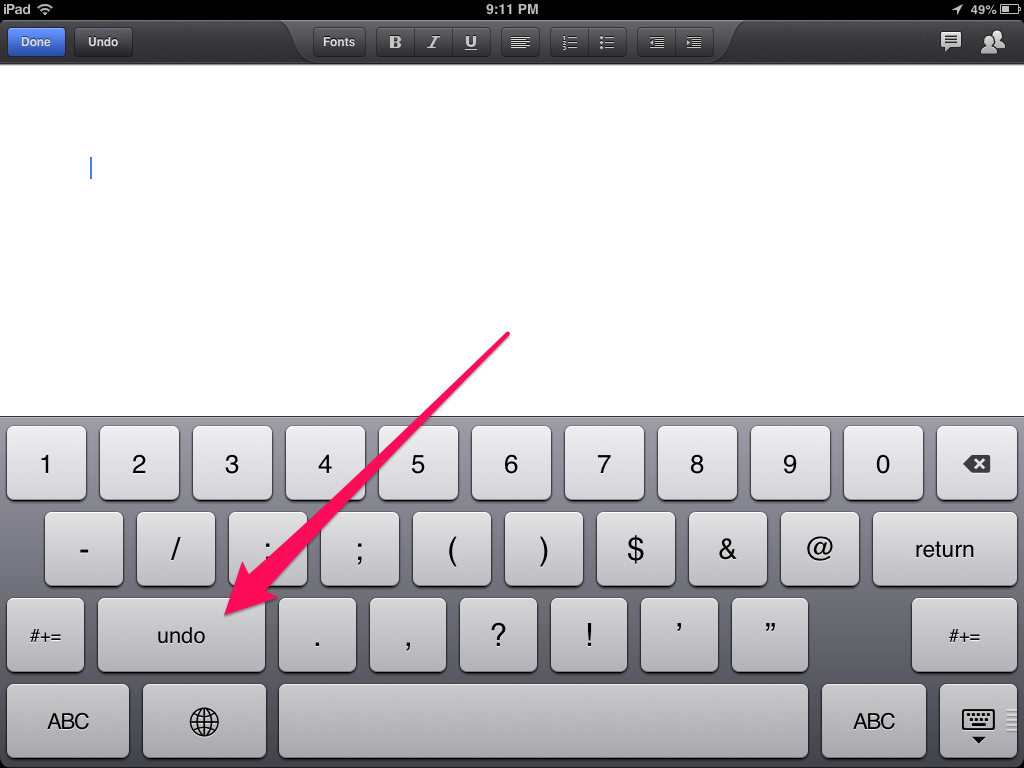
Blogger. (Settings -> Basic).

unalskdj

WordPress. (Settings -> Reading)

If a public blog still seems uncomfortable, but you understand why a private blog isn’t ideal there’s good news: there is a middle ground. Make your blog unlisted. An unlisted blog is public; anyone can view it, but only if they have the direct URL. Your blog won’t show up in search engines, but if your students want to share a post with their grandparents across the country it’s easy for them to do that. You share the blog’s URL with parents, and they can easily access and share the posts.

As educators, we need to be using blogs (and other social media) to tell our story. If we don’t tell our story, someone else will. And there’s no guarantee they’ll do a good job telling it.

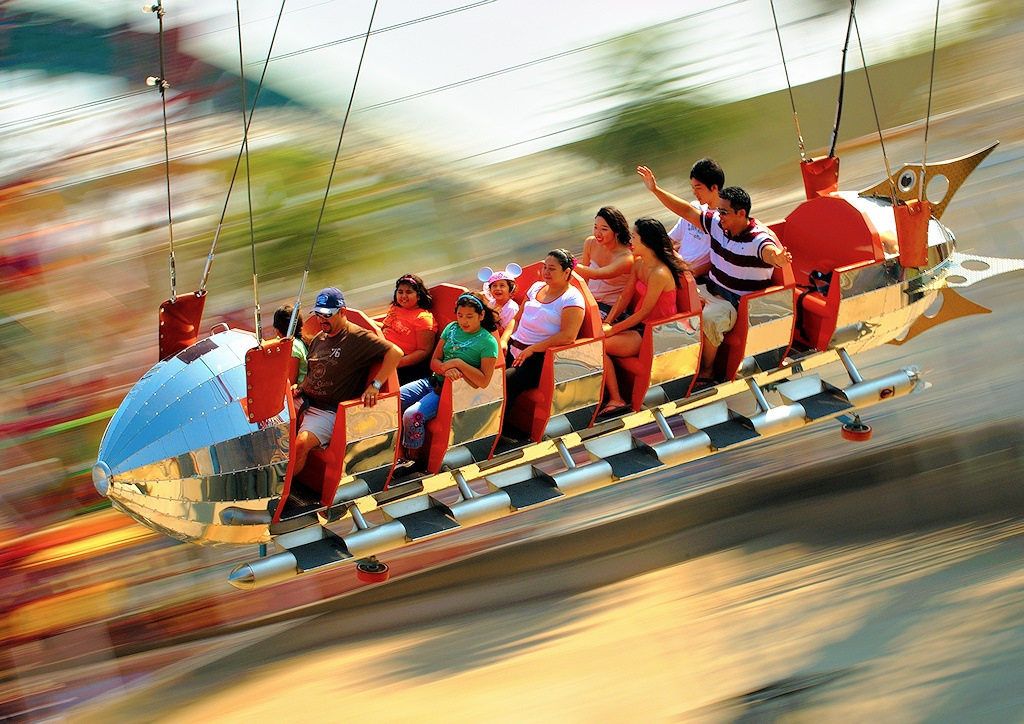
photo credit: Darwin Bell via photopin cc

iPad Frozen? Try a Hard Reboot

ice cubeIt happens. iPads freeze up and become completely unresponsive. The screen doesn’t respond; the home button doesn’t work; the sleep button doesn’t work; holding down the sleep button to power down doesn’t work. Now what?

A hard reset.

To perform a hard reset hold down the Sleep and Home buttons simultaneously (like you do for a screenshot, but hold them down) for about 10 seconds. If the swipe to power down option comes up, ignore it and keep holding the two buttons down. After about 10 seconds the iPad will power down and reboot (you’ll see the Apple logo when this happens). This is the equivalent of holding down the power button on a desktop/laptop to force a power down when they freeze.

Needing to perform a hard reset on an iPad (or iPhone) should be a very rare occurrence, but it’s a good trick to know.

photo credit: djking via photopin cc

Did You Notice the New iOS 7 Timer? It’s Amazing!

There are lots of reasons why people are excited about iOS 7. But the new timer has got to be one of the best upgrades. I know what you’re thinking, “it’s just a timer.” But it’s so much better now – for three reasons.

1. It’s visual.

photo_1__2_

As teachers we use timers with our students all the time. The new iOS 7 timer not only counts down, it has a red bar that makes its way around a circle as time passes. One trip around the circle, the time is up. Halfway through your timer? Halfway around the circle. The longer the timer, the slower the movement of the red bar. It’s great for those visual students who need to see how much time they have left.

2. It’s easy to find.

photo_3__2_

It’s accessible through the control center. A quick swipe and a tap and you’re there, ready to set it. No more going back to the home screen to find the clock app. And from the Control Center, it doesn’t just bring you to the clock app; it brings you straight to the timer!

3. You can see it from the lock screen.

photo_2__2_

This is really the best. When you’re at the lock screen, your timer is right there counting down (where you want it). No longer are the days of having to unlock your iPad (or iPhone) just to check on a timer. iOS 7 has a lot of new features. Don’t overlook the new timer.

Using Blogger Labels to Communicate with Different Groups

Blogger iconThe questions usually begin like this:

  • I want a blog, but I have 6 classes (periods). Do I have to have six blogs?
  • I have a classroom blog, but I have a different group of students for reading; how do post just for my reading families?

Labels! Each blogger post comes equipped with the ability to give it one or more labels: such as “Period4” or “reading.” The options for adding labels are on the right  when you’re composing a new post (the red arrow below). When the post is published, the labels will appear at the bottom of the post. Labels are a great way to sort blog posts into categories.

Adding a label

Also notice that when you’re composing, the labels you’ve used before show up in blue and you can just click on them and they’ll be added to the post (the green arrow above).

Now posting with labels is all well and good, but what if you want a user to easily be able to find a bunch of posts with a particular label? How do those fourth period students easily access only their “Period4” posts?

Post with label

One way is to scroll through the posts looking for one that is labeled “Period4” (red arrow above). That label will be hyperlinked, and if you click on the label you’ll get a page with only posts containing that label. This will certainly work, but it means asking your users to scroll down your blog posts looking for a specific label. This could be time-consuming. Fortunately, there’s a better way.

Add gadget

From your Blogger Dashboard, navigate to the Layout screen. Along the right sidebar or the top (your choice) you can add a “gadget.” When the select gadget window pops up (pictured below), select the Labels gadget (you’ll have to scroll down to find it).

Labels gadget

Once you’ve selected the Labels gadget you’ll be given some options. Do you want to show all your labels, or just some of them? How do you want them sorted? Should they be formatted as a list or as a cloud? Should it show the number of posts per label? Once you’re set, Save it and you’re ready to go.

Labels gadget options

Now, head back to your live blog and your labels will be there for easy access. And remember, each post can have more that one label. So if you have information for more than one class, give that post multiple labels and it will show up in more than one label category.

Blog home with labels


Users can now easily click on a specific label and get access to just that content.

iPad Guided Access: Helping Students Stay on Task

It happens like this: The last few times you’ve used an app with your students they’ve all done very well… except one. You find the student makes poor decisions and finds his or her way into another app to play around. You could take the iPad away, but then the student can’t do what you need them to do. If only you could walk away and be sure they’d stay on task (or at least in the correct app). You can.

Guided Access allows you to temporarily lock the device in a specific app, and even disable part of the screen (so students can’t access a menu and navigate somewhere else).

In the Settings app, tap on General on the left, and then Accessibility near the bottom of the right-hand pane.

Accessibility

In Accessibility look for Learning: Guided Access.

Guided Access

Here, you can turn on Guided Access and set a passcode (a four-digit number).

Turn on, passcode

Now, with Guided Access on you’ll get a menu when you triple-tap the home button from within an app. This will give you options to turn off the Home button, disable the touch screen, or lock the device rotation (red arrows). You can also drag to create greyed out areas of the screen to disable specific menu items before tapping Start to activate Guided Access (yellow arrows).

Guided Access Setup

When Guided Access is activated triple-tapping the home button brings up a passcode prompt for you to disable Guided Access and return to normal functioning.

So, to help keep a student on task or confidently (and safely) share your teacher iPad with a student, consider Guided Access.

UPDATE:

You can also add a timer when you enable Guided Access.

Guided Access timer.

Guided Access timer.

When the time runs out the iPad stops working and asks for the guided access password. This could be used to say to a student, “if you work on ________ for __ minutes, you can have this incentive” or “if you can __________, then as a reward you can spend __ minutes with the __________ app.” In either case, you don’t need to be the one watching the clock – Guided Access will take care of that for you.


If You’re Going to Use iPads With Kids, You’ll Have to Know This Trick

UndoOkay, I admit it. I make mistakes. And I love the “undo” command. You know, command+z in OS X and ctrl+z in Windows.

And if you’ve ever worked with kids you know they make mistakes too. There they are, writing away when somehow they manage to select a paragraph or two (or maybe they “select all”) and accidentally bump the delete key… oops.

Some text…

text1

Selected…

selected

And deleted…

and deleted

Oh no. This is an iPad; there’s no command+z. But… there is an undo button. With the traditional keyboard up, tap the “.?123” button to bring up the secondary keyboard. There, on the left is the “undo” button.

undo button

Google Drive and Pages both have their own undo buttons (up top on the left, did you notice those in the screenshots?) but this works everywhere. Evernote, Notes, etc. Anywhere you enter text.

So, the next time your students lose a paragraph of work (or more), you can help them get it back.

Sadly, the undo button is not present on the iPhone.

——-

photo credit: llauren via photopin cc

For those out there that noticed the Lorem Ipsum text in the screenshots, the Veggie Ipsum generator I used is here. For the meat-lovers, try Bacon Ipsum.

No, There Isn’t an App For That

(But that’s okay)

iPads are not teachers. And iPads won’t replace teachers. But if they could, they should; if a few hundred dollars in hardware can do the same job I do, then I should be replaced. But iPads don’t teach, they support.

iPads are also not about teaching core skills. Sure, there are some skill building apps out there that both my students and I love, but the iPad’s power is in creative creation. It’s power is giving an extensive toolbox to students as they try to show us what they’ve learned. And there isn’t an individual app that will do that (and that’s okay).

About a year ago I first heard Greg Kulowiec of EdTechTeacher talk about App Smashing. App Smashing is the process of using multiple apps together to create a single product. The power of the iPad isn’t about one or two innovative apps. It’s about finding creative ways to get apps to work together (smashing them together to get something new).

Drawing Pad does some cool stuff. So does Chrome. So does Explain Everything. So does iMovie. So does Book Creator. But all of them have their own limitations. Each of them lack some really creative features. But at the same time, each of them does some amazing things the others don’t. The power of the iPad is in getting those apps to work together to do some truly creative stuff.

Students can grab pictures from web in Chrome (properly cited, of course) and put them in the Camera Roll. Students can then pull those images into drawing pad and annotate them, sending the updated version back to the camera roll. Students can pull those newly-updated images into Explain Everything to add motion or overlay speech. They can bring those images into iMovie or Boook Creator. And then they can move the final product to Dropbox or Drive to share them with the world.

Apps Smashed: Chrome, Photo Roll, Drawing Pad.

Apps Smashed in this illustration: Chrome, Camera Roll, Drawing Pad.

In App Smashing, the ipad’s Camera Roll is that central hub. There isn’t a traditional file structure on iOS devices, but the camera roll serves as a place to store/access/transfer images and movies.

Granted, most of the apps I’ve mentioned cost a few bucks each. And no doubt there are free apps that will do similar things. But in many cases what that price tag gives you is the ability to share content across apps. If you want to just play around and keep creative content within a single app you can probably find a free way to do that. If you want to truly leverage the power of the iPad and share content across apps, that may cost you $1.99. But it’s well worth it.

There isn’t an app for that. But there are 3 or 4 that if you use together you can do some pretty amazing stuff.

Technology, Carrots, and What We’re Doing Wrong

carrotMany classrooms these days are looking to make the technology in their classrooms seamless, a standard part of what they do. This is great. Our students live in an environment where they use technology outside school all the time and to keep it out of their hands at school would be doing them a huge disservice. However, it’s important to remember what it means to have technology be seamless, and truly a standard part of what we do.

Pencils are used seamlessly in schools. They are available to students when they want them. The students know how to use them safely. And the adults don’t take them away (unless, of course, the students are using the pencils in an unsafe manner). And of course, no matter how poorly a student may have behaved in one subject, it would be unheard of to then take away his/her pencil for another subject.

But in too many classrooms where we are trying to integrate technology, our mindset isn’t quite where it needs to be. If we truly believe that we want to seamlessly integrate technology, then we can never use it as a behavioral carrot. If the plans are to use iPads (or any other piece of technology) in math, then no matter how poor student decisions were earlier in the day the iPads have to come out in math.

ipad_paperWe can no longer say, “Well, you didn’t listen well in that last lesson, so we’re not going to use [insert shiny technology] this afternoon.” Would we ever catch ourselves saying “Well, you didn’t listen well in that last lesson, so we’re not going to use pencils this afternoon”? Or lined paper? Or pattern blocks? No, that would be absurd.

Technology cannot be a carrot. It can’t be a behavioral bribe. If we truly believe technology is a core part of what we do, then we can’t take it away (unless students are using it inappropriately).

Playdate Boston

groupswingLast weekend I had the pleasure attending Playdate Boston, the latest iteration of educators redefining professional development to make it more useful for thm. The premise of a Playdate is that in most professional development sessions you hear about all these new fantastic tools, but don’t get the time to actually play with them and figure out how they will (or won’t) fit into you professional life. Playdate was a time to bring educators together to do just that.

Each playdate session had (loosely) four parts:

  1. A quick intro the the topic of the session.
  2. A quick discussion about what a teacher could do with the tool. How to use it with kids, roadblocks, etc.
  3. Time to play!
  4. A quick debrief.

The day ended with a Slam where participants shared what they’d learned, allowing us to hear about the sessions we didn’t attend. Collaborative notes from the Slam are here.

A few days out, this is what has stuck in my mind (in no particular order):

  • Playdates are fun. Educators need more of these.
  • Explain Everything. I need to spend more time with this app – and by that I mean my students need to spend more time with it. The last couple updates have made the app explode. Embedded browsers, that are live during recording blew me away. It really is such a versatile tool for allowing students to show their learning.
  • Bump is a much better way for my students to get content from one iPad to another. In the past we’ve used a shared classroom Dropbox account. Bump will do this more easily.
  • Workflow idea. Every Evernote account has a dedicated email address so you can email directly into the account (or to a specific notebook!). Put that email address in the contacts of student iPads so they can email their work directly to a teacher’s Evernote account.
  • iMovie (for the iPad). I (and my students) also need to spend more time with this app. It’s one-stop shopping for movies (shooting, selecting clips, editing, publishing, sharing). Learned about one downside of the app allowing you to not save the unwanted clips – no material for a bloopers reel.
  • Discovery Education has clips in its library that are okay to reuse in student projects.
  • Symbaloo. This is cool, a visual way of curating links. I use a “Student Links” page on my classroom website, but I like the visual tile look of Symbaloo.
  • Image Dictionary is a Chrome extension that allows users to look up a word, but instead of getting a dictionary definition (which is often not terribly useful for a struggling reader) it produces a picture. Great for younger readers.

And to cap off the day, it was the opening night of Boston Roller Derby!
Roller derby. #BostonDerbyDames

top photo credit: Express Monorail via photopin cc

Students, Parents, and the Economics of Free iPad Apps

cash

I love using free iPad apps in my classroom. Who doesn’t? But with free apps comes ads – ads that neither my students nor I have any control over. Being a digital citizen means knowing how to deal with it, but how do you explain it to 8-year-olds? And their parents?

I found this worked well. Below is the email I sent out to parents explaining what I did with my 3rd graders:

The class had a chat today about Digital Citizenship and where iPad apps come from.

I started explaining that apps are programmed by real people. Making apps is their job, and they need to get paid. And they do, usually through one of three ways.

  1. Some apps cost money. Those apps work really well and don’t have any ads (commercials). The money we pay to purchase the app goes to the developers. These include the Explain Everything and Drawing Pad apps we use in the classroom.
  2. Some apps are free but have limited features. Angry Birds is a great example of this. You can get the free version, but it only has a few levels. The idea is if you like the game you’ll purchase the full, paid, version. The developer gets money when we buy the full version.
  3. Other apps are free but come with advertisements. Rather than us paying for the app, another company pays the developer for screen space, forcing us to see their ads. I compared it to TV. Sometimes TV is free (network broadcast), but advertising pays for it. It’s the same with some free apps.

We use all three kinds of apps, though we spent most of our time talking about the last kind. I explained the ads are like commercials in that we don’t have to watch them. When commercials come on when we’re watching TV we can mute them, or talk to someone, or even leave the room. We are in control.

The same is true with app ads. We can ignore them. The catch is, as end users, we don’t get to control what the ads are. So far we’ve seen ads for games, juice, and… local singles.

ad1   ad2   ad3

Fortunately, that last one is only text, no images. Also fortunately, developers know that users rate and comment on apps, and if an app designed for kids has ads that are truly inappropriate, they will hear about it in the comments of the app store (and developers can’t delete those comments).

I reiterated that we can ignore the ads and that if kids ever come across something they have questions about or feel uncomfortable about that they should find an adult.

Exciting and innovative things happen when we use technology to expand the walls of the school and where learning can occur. We can also bump into things we weren’t looking for. We have good internet filters in Arlington, though no filter is 100% perfect for all grades all the time. So, part of being a good Digital Citizen means having an internal filter, understanding how it all works, and knowing how to behave in a safe way. And knowing that if you find something that doesn’t sit right that students are in a building full of caring adults who are more than willing to help.

Parent response was very positive, ranging from “Thanks, glad you’re on top of this!” to “It is good to know that you are worrying about these things and that our 3rd graders are not being exposed to bad stuff in the schools.

Teaching is messy. And when you add the iPad, or any other hyper-connected tool, it can get really messy. The key is it get out ahead of it, and be honest (with kids and parents). As educators we are doing new and innovative things every day. Things aren’t always going to go as planned. Just make sure to roll with it, and make sure everyone knows what’s going on.

photo credit: AMagill, Personal Income via photopin cc