iMovie Trailer Storyboards (UPDATED)

imovieappThe new iOS iMovie app that premiered with OS X Mavericks and the iPad Air came with a few new features including two new trailer templates. A couple of months ago I posted about using the trailers, and posted links to PDF templates.

I’ve created single-page storyboards for the new trailers, and separated the old ones into individual files. They’re PDFs, so they’re easy to use in apps like Notability if you really want to go paperless.

Some of these I created, some are from the TeachingParadox blog (which has been taken down).

Enjoy!

I’ve Stopped Using Automatic Update for Apps in iOS 7

20131016-204835.jpgIt sounded so great when I first heard about it: having apps automatically update. Fantastic! No more having to go into the App Store to “update all.” No more having those  red numbers on the App Store icon, nagging me to take care of them.

20131016-204258.jpg

Blue dot indicating update.

So as soon as I could I turned on automatic updates, and for a couple weeks it was great. All my apps updated on their own. The red numbers on the app icon never appeared. All seemed good.

But then I realized I was missing something. When apps updated, I found I wasn’t always noticing the little blue dot indicating they had updated. And more so, I had no idea what had been updated.

Okay; at this point I need to admit something. When I update apps, I am one of the few people who actually reads the update notes. I want to know if the update is just “bug fixes” or if a new feature actually been added. With automatic updates I found I never knew. With automatic updates I was missing out on things.

20131016-204308.jpg

Update notes.

So I’ve given up on automatic updates. I still make sure my apps are updated, and now I always know what features have been added and which bugs have been fixed.

Note: For students, I still strongly advocate for automatically updating apps.

iPad Frozen? Try a Hard Reboot

ice cubeIt happens. iPads freeze up and become completely unresponsive. The screen doesn’t respond; the home button doesn’t work; the sleep button doesn’t work; holding down the sleep button to power down doesn’t work. Now what?

A hard reset.

To perform a hard reset hold down the Sleep and Home buttons simultaneously (like you do for a screenshot, but hold them down) for about 10 seconds. If the swipe to power down option comes up, ignore it and keep holding the two buttons down. After about 10 seconds the iPad will power down and reboot (you’ll see the Apple logo when this happens). This is the equivalent of holding down the power button on a desktop/laptop to force a power down when they freeze.

Needing to perform a hard reset on an iPad (or iPhone) should be a very rare occurrence, but it’s a good trick to know.

photo credit: djking via photopin cc

Did You Notice the New iOS 7 Timer? It’s Amazing!

There are lots of reasons why people are excited about iOS 7. But the new timer has got to be one of the best upgrades. I know what you’re thinking, “it’s just a timer.” But it’s so much better now – for three reasons.

1. It’s visual.

photo_1__2_

As teachers we use timers with our students all the time. The new iOS 7 timer not only counts down, it has a red bar that makes its way around a circle as time passes. One trip around the circle, the time is up. Halfway through your timer? Halfway around the circle. The longer the timer, the slower the movement of the red bar. It’s great for those visual students who need to see how much time they have left.

2. It’s easy to find.

photo_3__2_

It’s accessible through the control center. A quick swipe and a tap and you’re there, ready to set it. No more going back to the home screen to find the clock app. And from the Control Center, it doesn’t just bring you to the clock app; it brings you straight to the timer!

3. You can see it from the lock screen.

photo_2__2_

This is really the best. When you’re at the lock screen, your timer is right there counting down (where you want it). No longer are the days of having to unlock your iPad (or iPhone) just to check on a timer. iOS 7 has a lot of new features. Don’t overlook the new timer.

iPad Guided Access: Helping Students Stay on Task

It happens like this: The last few times you’ve used an app with your students they’ve all done very well… except one. You find the student makes poor decisions and finds his or her way into another app to play around. You could take the iPad away, but then the student can’t do what you need them to do. If only you could walk away and be sure they’d stay on task (or at least in the correct app). You can.

Guided Access allows you to temporarily lock the device in a specific app, and even disable part of the screen (so students can’t access a menu and navigate somewhere else).

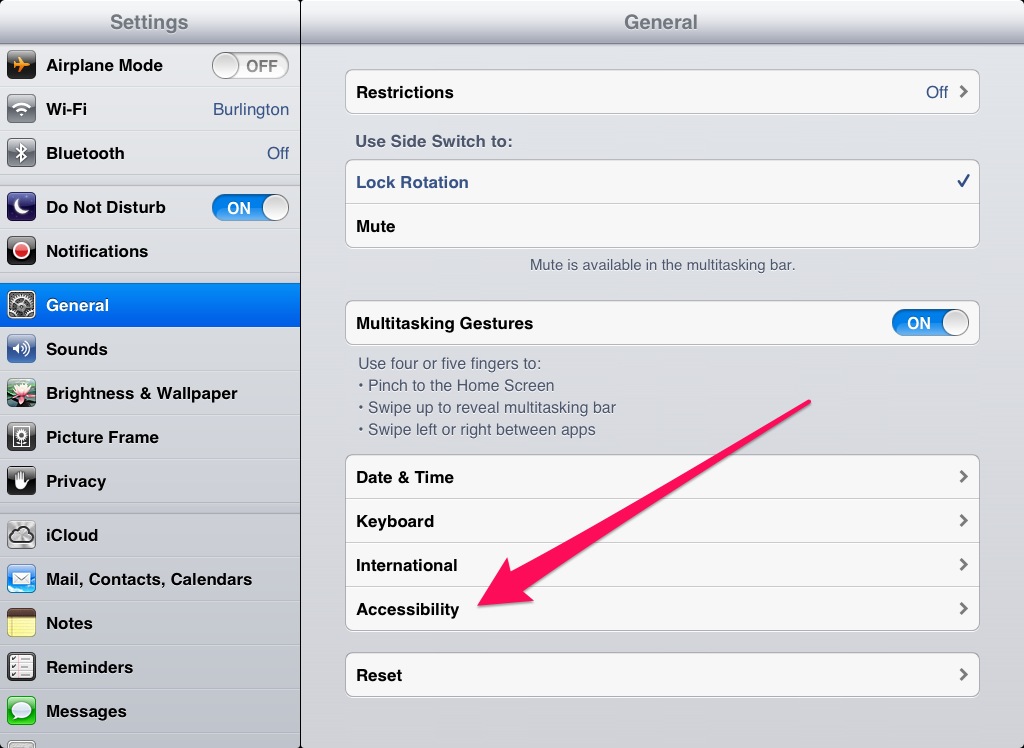
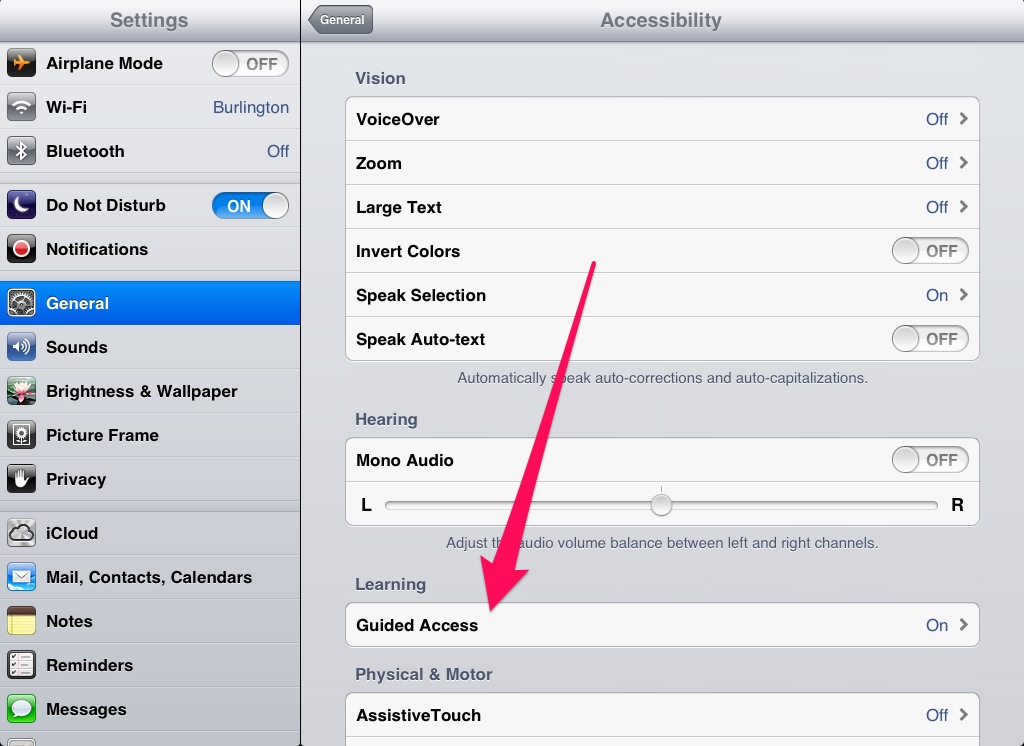
In the Settings app, tap on General on the left, and then Accessibility near the bottom of the right-hand pane.

Accessibility

In Accessibility look for Learning: Guided Access.

Guided Access

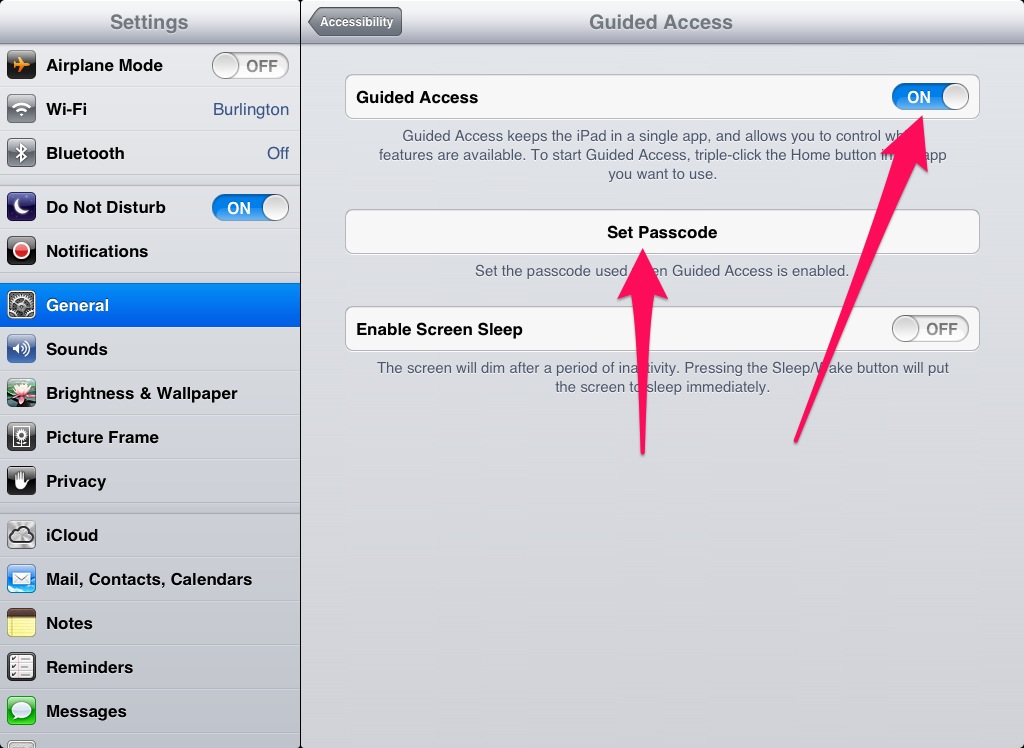
Here, you can turn on Guided Access and set a passcode (a four-digit number).

Turn on, passcode

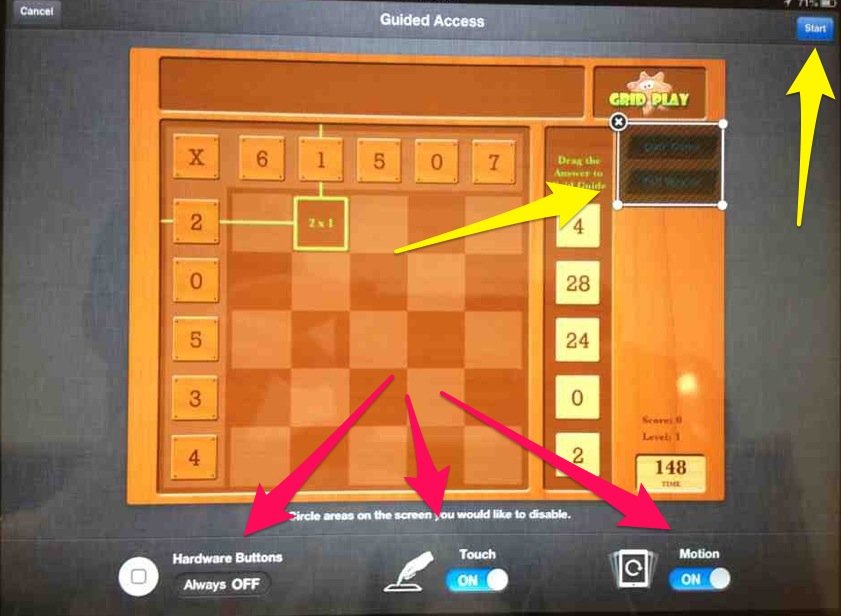
Now, with Guided Access on you’ll get a menu when you triple-tap the home button from within an app. This will give you options to turn off the Home button, disable the touch screen, or lock the device rotation (red arrows). You can also drag to create greyed out areas of the screen to disable specific menu items before tapping Start to activate Guided Access (yellow arrows).

Guided Access Setup

When Guided Access is activated triple-tapping the home button brings up a passcode prompt for you to disable Guided Access and return to normal functioning.

So, to help keep a student on task or confidently (and safely) share your teacher iPad with a student, consider Guided Access.

UPDATE:

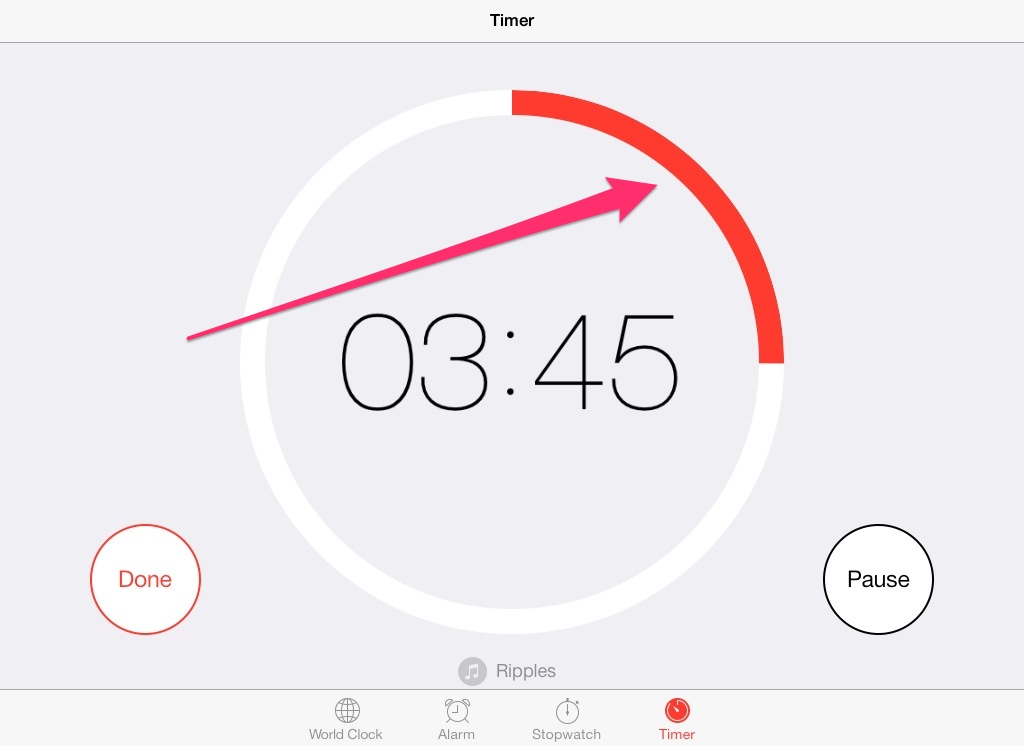
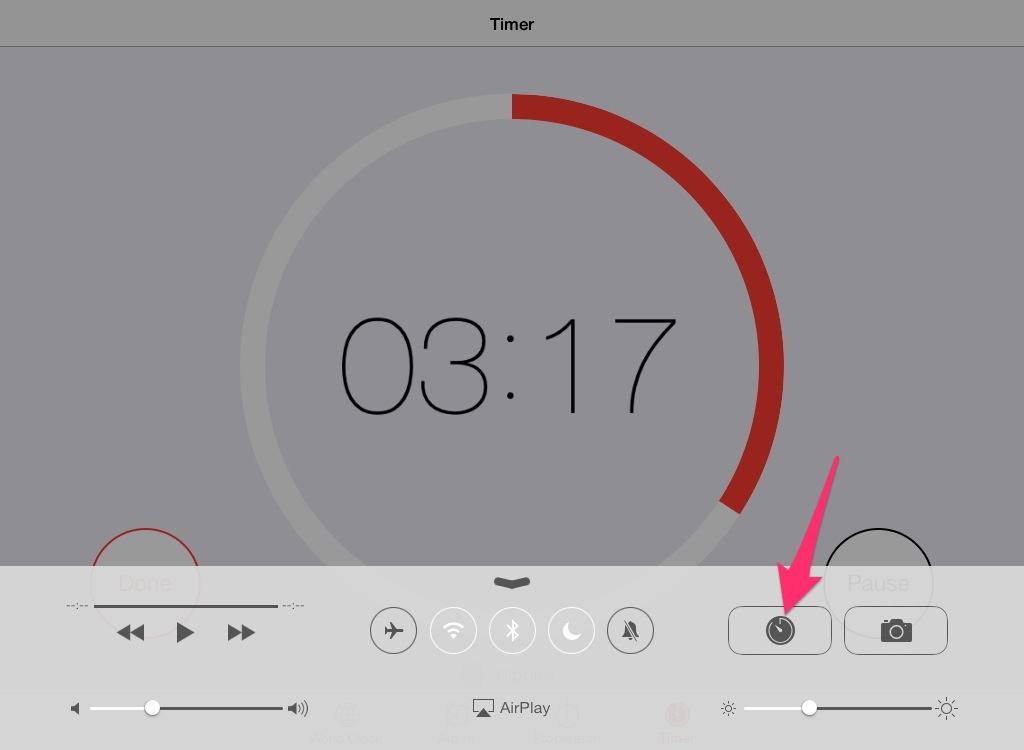
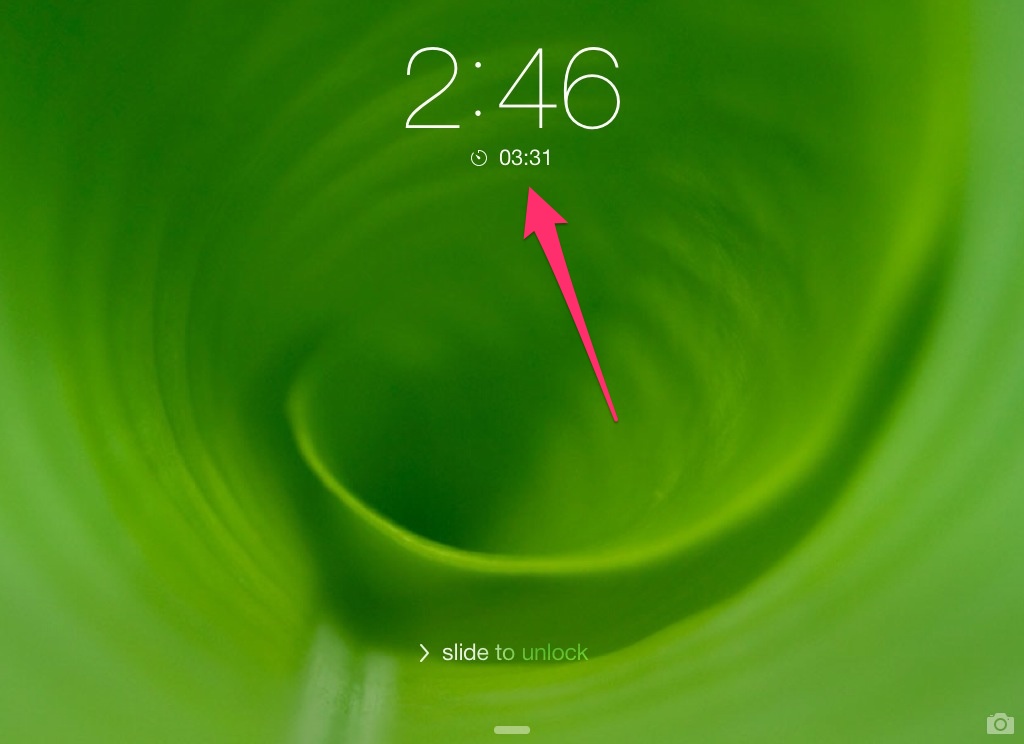
You can also add a timer when you enable Guided Access.

Guided Access timer.

Guided Access timer.

When the time runs out the iPad stops working and asks for the guided access password. This could be used to say to a student, “if you work on ________ for __ minutes, you can have this incentive” or “if you can __________, then as a reward you can spend __ minutes with the __________ app.” In either case, you don’t need to be the one watching the clock – Guided Access will take care of that for you.


If You’re Going to Use iPads With Kids, You’ll Have to Know This Trick

UndoOkay, I admit it. I make mistakes. And I love the “undo” command. You know, command+z in OS X and ctrl+z in Windows.

And if you’ve ever worked with kids you know they make mistakes too. There they are, writing away when somehow they manage to select a paragraph or two (or maybe they “select all”) and accidentally bump the delete key… oops.

Some text…

text1

Selected…

selected

And deleted…

and deleted

Oh no. This is an iPad; there’s no command+z. But… there is an undo button. With the traditional keyboard up, tap the “.?123” button to bring up the secondary keyboard. There, on the left is the “undo” button.

undo button

Google Drive and Pages both have their own undo buttons (up top on the left, did you notice those in the screenshots?) but this works everywhere. Evernote, Notes, etc. Anywhere you enter text.

So, the next time your students lose a paragraph of work (or more), you can help them get it back.

Sadly, the undo button is not present on the iPhone.

——-

photo credit: llauren via photopin cc

For those out there that noticed the Lorem Ipsum text in the screenshots, the Veggie Ipsum generator I used is here. For the meat-lovers, try Bacon Ipsum.