Printing Multiple Pictures to a Page, on a Chromebook

We’ve gone from Windows PCs to Chromebooks at my school and for the most part the transition was easy. Most of what we were doing was web-based anyway so being confined to Chrome was no problem. And being able to install apps from the Chrome Web Store and not needing an administrator’s password was an added bonus.

This missing piece for many teachers was being able to print multiple images on a single page (easily). Sure, you can manually insert them in a Google Doc, but it’s not a great solution, especially if you have a bunch of them. In Windows or on a Mac you can print 3, 4, 6, 9 pictures to a page very easily from the Print Pictures dialog box (Windows) or Preview (Mac OSX). Chromebooks just don’t seem to do this. I don’t like doing a lot of printing, but in a elementary school sometimes you need pictures of all your students for things like holiday/Mother’s Day/Father’s Day gifts.

A search of the Chrome forums revealed similar issues. There just isn’t an app or extension that will do it. But online2pdf.com seems to do the trick.

To print multiple images on a single page, head over to online2pdf.com and find the “Select files” button at the bottom.

select files

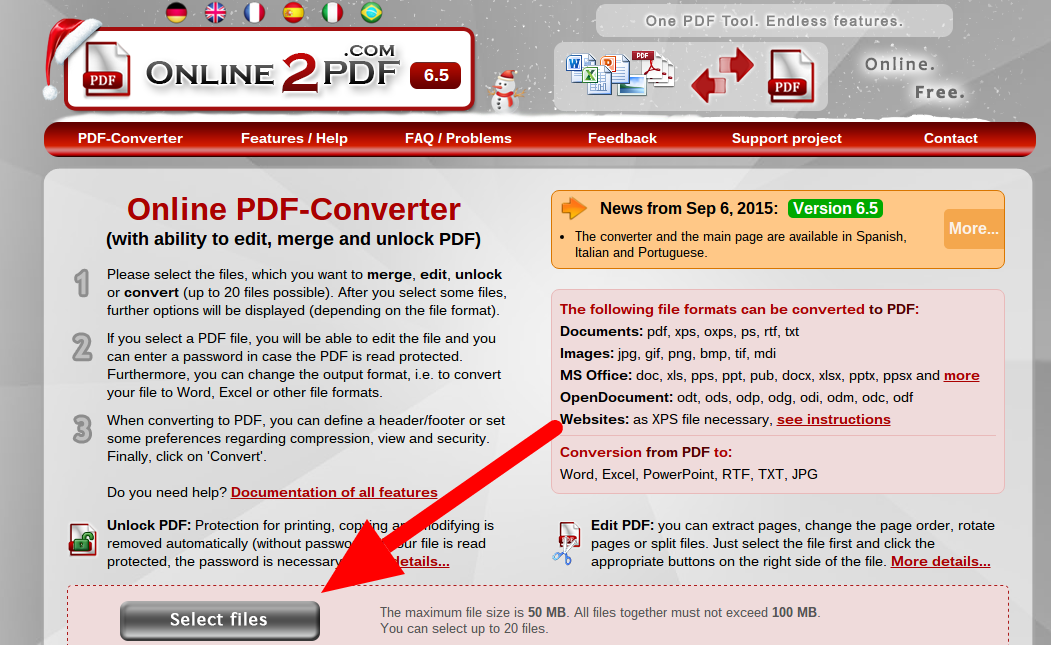
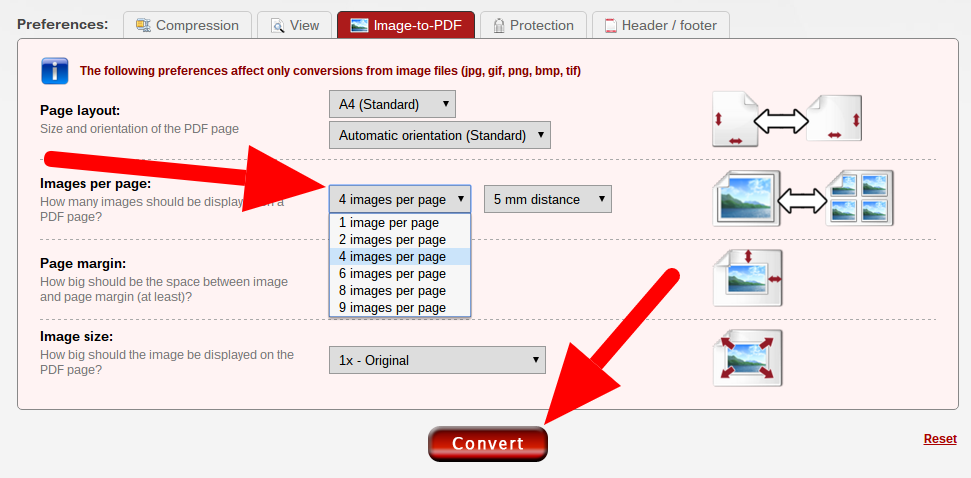
Click Select Files and you’ll be prompted to upload your pics. Once you upload them (you’re limited to 20 at a time), you’ll see this screen verifying the images you’ve selected. Don’t convert them yet; click the “Image-to-PDF” tab at the bottom first.

image to pdf

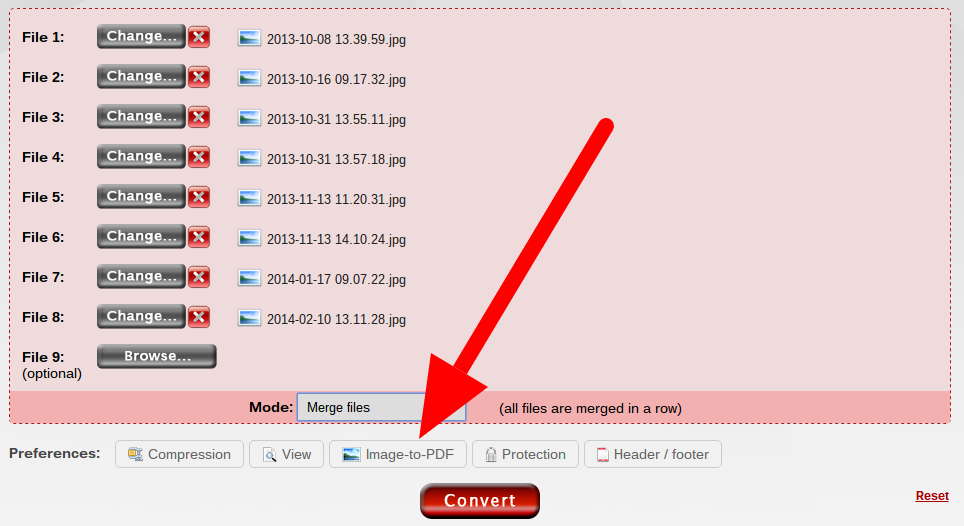
In the “Images per page” section, select the the number of image per page. One per page will give you pictures that are about 8×10, two per page is about 5×7, four per page is about 3×5. Then click “Convert” at the bottom.

convert

As it generates your PDF, you’ll get a progress screen.

waiting

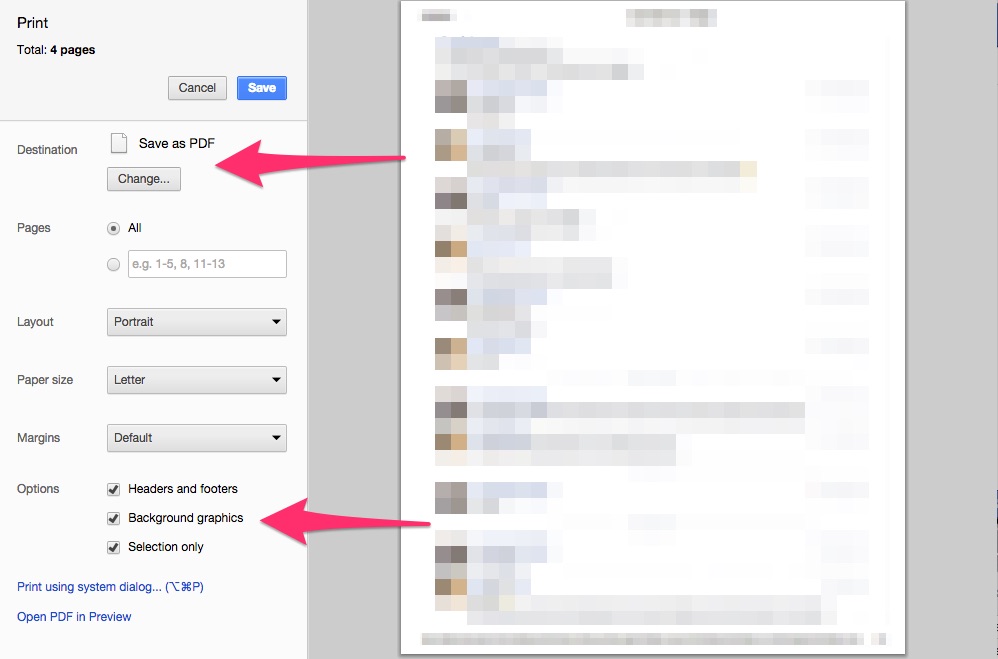
When done, your PDF will automitally start downloading. If for some reason it doesn’t, there’s a link to manually start the download. Once downloaded, you can open and print the PDF directly from your Chromebook. It will look like the prints you’re used to on a Windows or Mac machine. If you uncheck the “Fit to page” checkbox when printing the pictures will print a little bigger.


TIP: It seems to work better if all your images are portrait orientation or all landscape. If you have both, I’d run two batches – one of your portrait pictures and one of your landscape pictures. Onlie2PDF won’t rotate them for you and they’ll crop weird.

SAFETY: The FAQ (Frequently Asked Questions) page notes that, “all files and data are treated as strictly confidential, of course. Your files are only temporarily stored on the server of Online2PDF, after the conversion they will be deleted immediately.” This meshes with what I can see from the outside. The link to manually download your PDF stops working after a minute.

filenotfound


I hope this helps.

Who Says Kindergartners Can’t Code?

IMG_7347Hour of Code week started today. As an elementary Technology Integration Specialist, I know I want my students exposed to programming. The questions is, how low do I go? This year, I went all the way down to kindergarten.

Given the potentially short attention span of kindergartners, I shortened the Hour of Code to 45 Minutes of Code. I loaded the free Lightbot: Code Hour app onto a cart of iPads and headed down to the kindergarten wing. I like the Lightbot app a lot becuase the coding blocks are all symbols. For my younger kindergartners who are still learning to read, this levels the playing field. (This also makes Lightbot a great intro-to-coding app for my ELL students.)

I started the IMG_0397
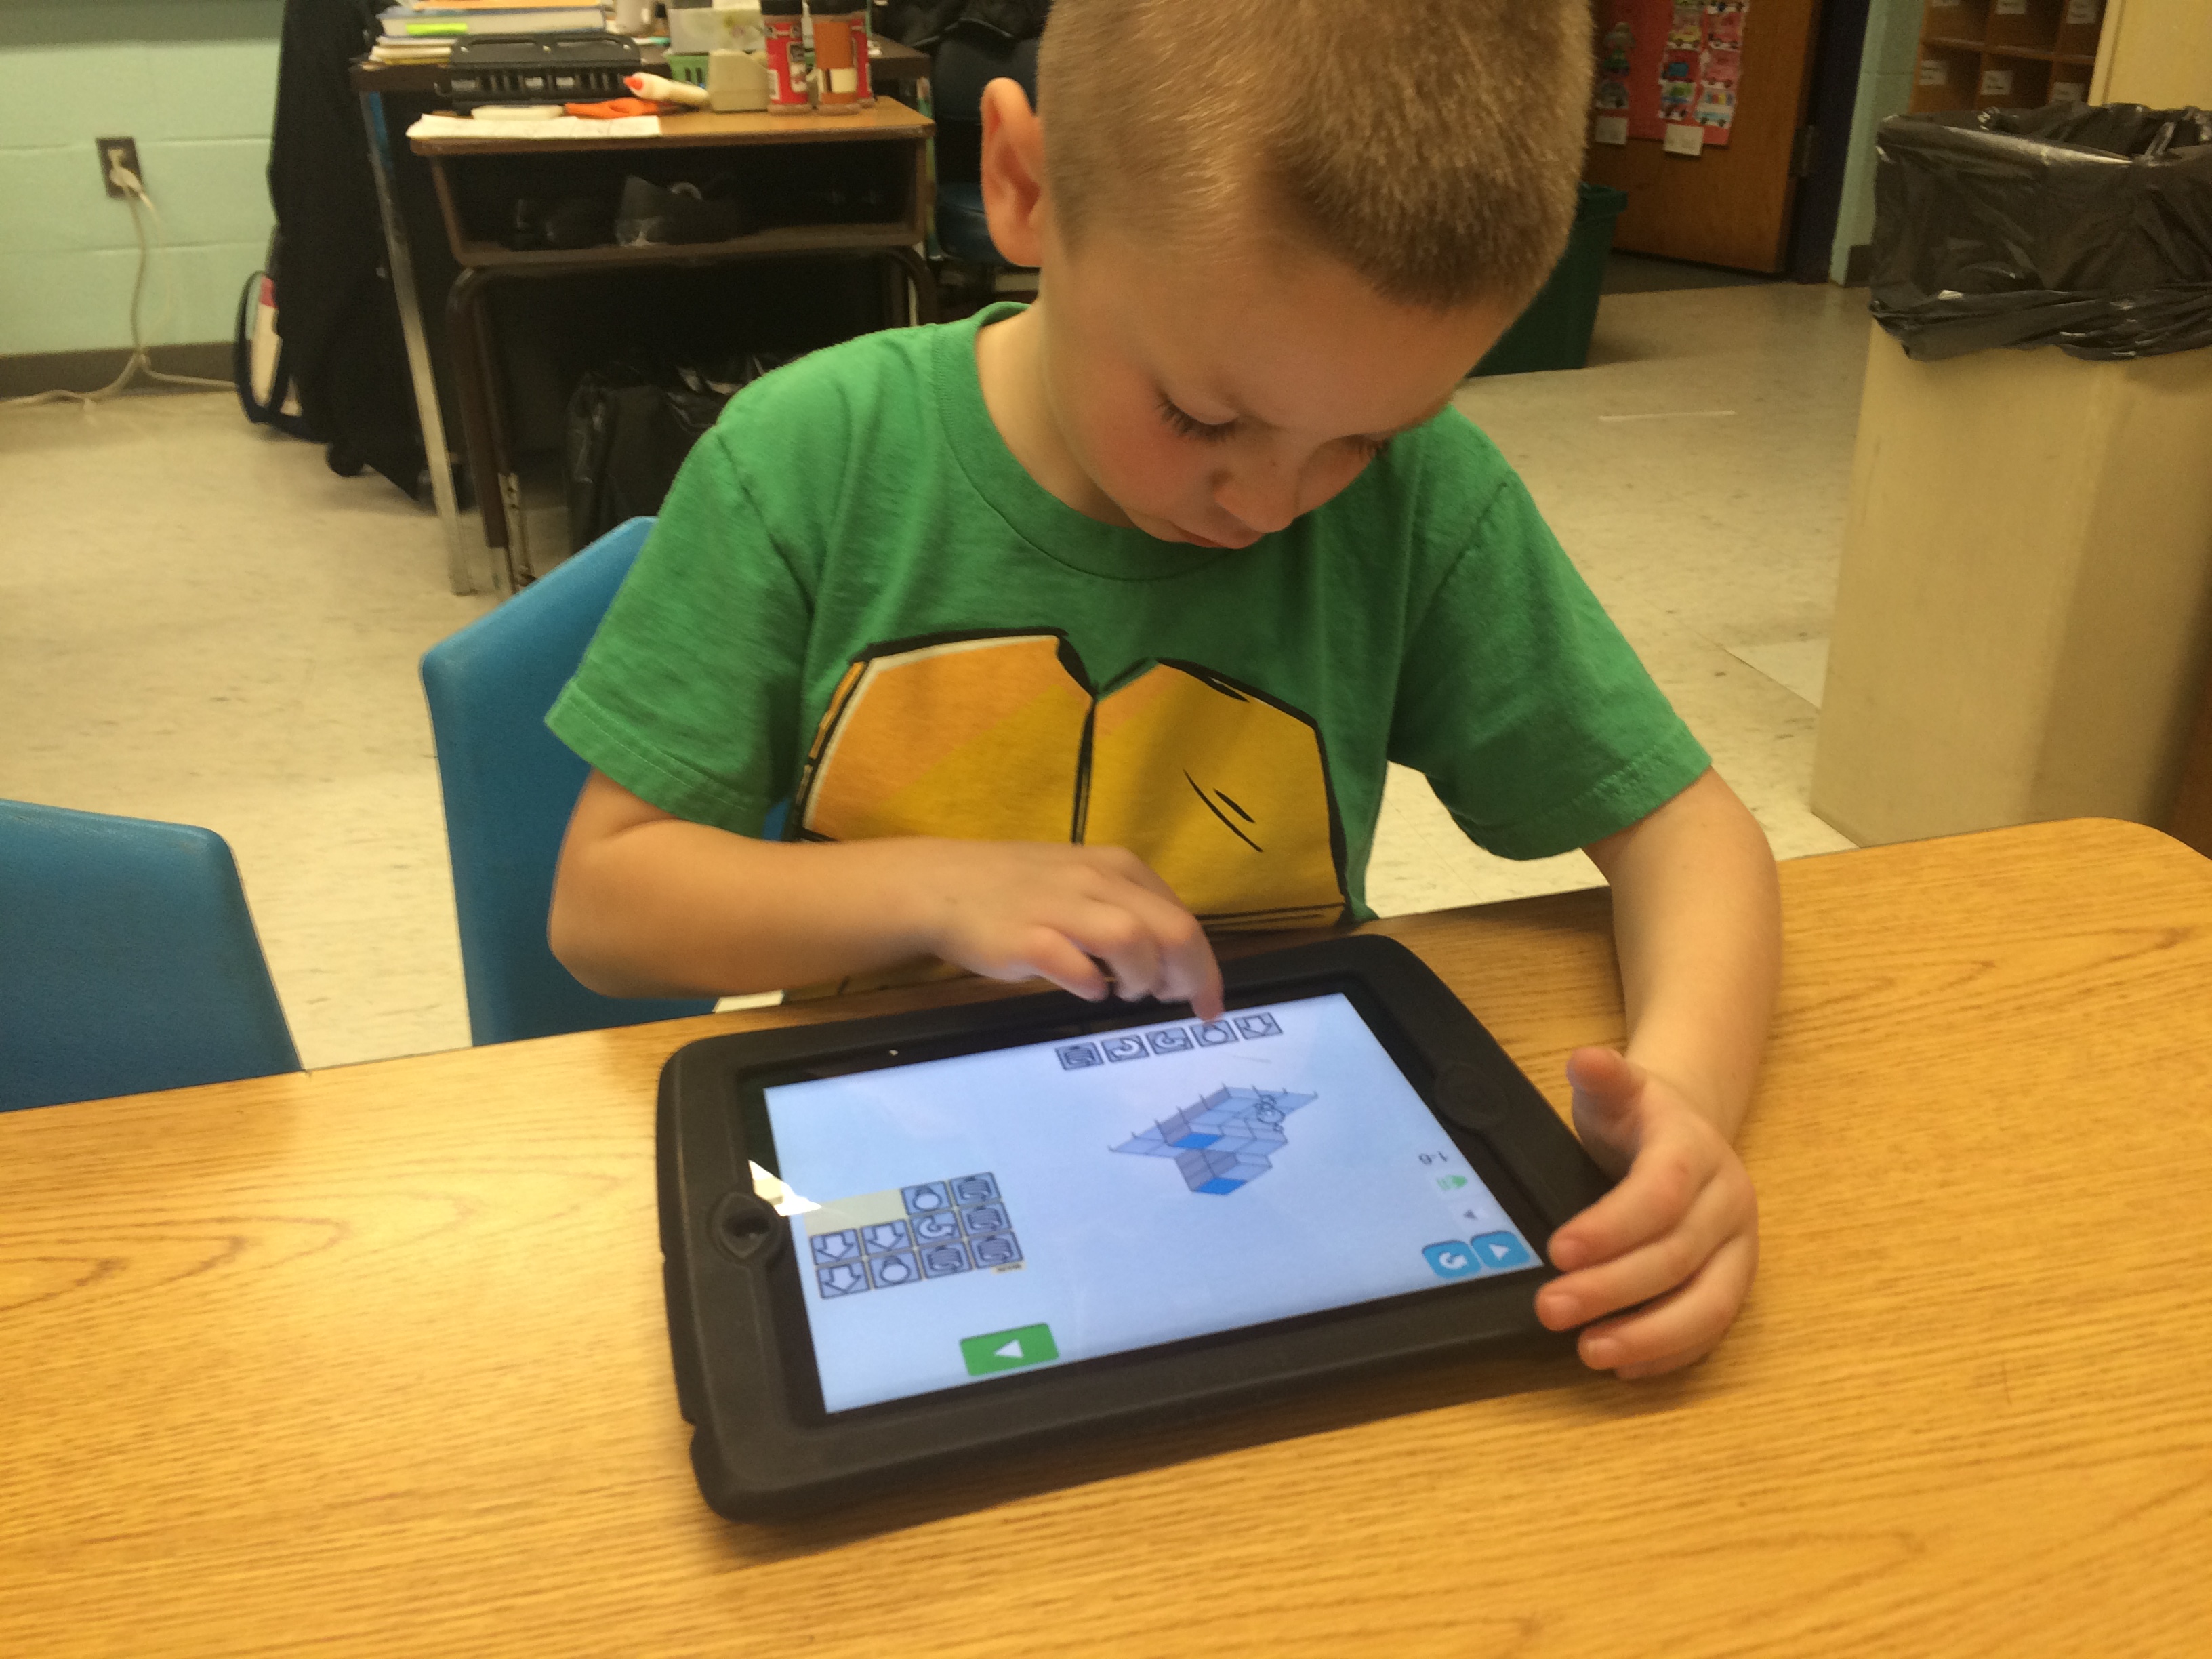
lesson talking about computers in general. In addition to being in things like laptops and iPads, they are in phones, microwaves, coffee makers, traffic lights, etc. Computers are, literally, all around us. Because of that, it’s important to have some idea of how they work, how to make them do what we want them to do. That conversation brought us to Lightbot.

IMG_0398We completed the first four challenges in Lightbot together, up on the projector screen. We explored the command blocks and what they did. We made some mistakes (turning is a particularly tricky concept for 5-year-olds to master) and learned from them – which is exactly what I wanted to have happen. Then I turned them loose on Lighbot on their own.

I asked the kids to start by going back and doing the 4 challenges we did together, on their own. Some moved through those challenges quickly, others took more time. Ultimately, they progressed further in the app than we had gone as a whole group – completing tasks they never saw with me. And at the end of my 45 minute block (with about 25 minutes of them coding on their own) we cleaned up. Or tried to; the problem was that the kids weren’t ready. They were totally engaged. They were getting stuck, and having to work through mistakes, but at no point did anyone say, “I don’t want to do this anymore.” When my 45 Minutes of Coding ended, they wanted to keep coding.

IMG_7349They did a great job, and I’m excited to put iPads back in those rooms with Lightbot still loaded. Maybe it can become a center for them. The computational and positional thinking that are involved are great. And no matter what anyone says, kindergartners can code.

Enough With the Elves Already (We Know They Don’t Work)

6444977071_68547bea23_oIt’s December again. That means elves on shelves are popping up in elementary classrooms (and living rooms) all over the place. The elf, children are told, keeps an eye on them and reports to Santa. The idea being that even when adults aren’t looking, someone still has their eyes on the children’s behavior.

The goal is simple, and it comes from a good place: teachers (and parents) know the holidays are approaching, children are getting excited, and adults worry (rightfully) that children will have extra difficulty regulating their behavior. So, the adults offer a reward. If you can stay in control and be good this month, even when you think no one is looking, the elf will tell the adults and you’ll be rewarded. Seems like a good idea, right?

The problem is that this kind of external motivation doesn’t help our children learn how to regulate their own behavior; it doesn’t help teach them to do the right thing. And worse, we’ve known about this … for a long time:

  • In a 1993 Harvard Business Review article entitled Why Incentive Plans Cannot Work, Alfie Kohn noted “when it comes to producing lasting change in attitudes and behavior… rewards, like punishment, are strikingly ineffective. Once the rewards run out, people revert to their old behaviors.”
  • In a 1999 meta-analysis of 128 studies, Deci, Koestner, and Ryan found that “as predicted, engagement-contingent, completion-contingent, and performance-contingent rewards significantly undermined free-choice intrinsic motivation [the ability to do the right thing simply because it’s the right thing] … as did all rewards, all tangible rewards, and all expected rewards.” They also noted that, “tangible rewards had a significant negative effect on intrinsic motivation … and this effect showed up with participants ranging from preschool to college.”
  • In his 2009 book Drive, Daniel Pink discussed the seven deadly flaws of extrinsic motivation (what he calls carrots and sticks). These carrots and sticks can:
    • extinguish intrinsic motivation
    • diminish performance
    • crush creativity
    • crowd out good behavior
    • encourage cheating, shortcuts, and unethical behavior
    • become addictive
    • foster short-term thinking

15750930699_10e64e62e1_oAdmittedly, Deci, Koestner, and Ryan point out that “although rewards can control people’s behavior—indeed, that is presumably why they are so widely advocated—the primary negative effect of rewards is that they tend to forestall self-regulation. In other words, reward contingencies undermine people’s taking responsibility for motivating or regulating themselves” (my emphasis). But as teachers, isn’t one of our goals to teach our students to take responsibility and regulate their own behavior (not simply have us control it) – two things that our reward systems actually undermine?

Are there a small percentage of students for whom simply getting through the holidays is the goal? Sure. But should this be the default goal for the entire classroom? Definitely not.

Teachers – we have to do more than just control behavior, we have to teach responsibility and self-regulation. We want to cultivate students who will do the right thing because it’s the right thing, not because we’ll reward them. The Responsive Classroom approach teaches us that effective reinforcing teacher language is, “clear and direct, genuine and respectful, and specific“; it’s not used in a manipulative way like reward systems. Teacher language is a powerful thing; tell your students they are working hard, and how their attention to behavior benefits others. “Verbal rewards – or what is usually labeled positive feedback in the motivation literature – had a significant positive effect on intrinsic motivation” (Deci, Koestner, and Ryan, 1999); this is what we really want. Aim to build a strong and trusting community in your classroom and you won’t need elves to extort good behavior out of your students (and they don’t really work anyway).

Of course, if you’re using an elf for non-coercive strategies like practicing writing letters to your elf or calculating the distance/rate of movement he had to get from one spot to another that’s totally fine. We just need to stop the bribery thing.

photo credit 1: Have I Got a Present for You! [Explored 12/2/2011] via photopin (license)
photo credit 2: Elf on the Shelf via photopin (license)

Rewards do not create a lasting commitment. They merely, and temporarily, change what we do” Why Incentive Plans Cannot Work, Alfie Kohn. We professionals, have to do better than this (even in December).

Printing (or Saving) a Facebook Chat

ThumbFinal_4.9.15Recently, a friend asked me about printing one of their Facebook Chats. I sat down to lend a hand thinking it would be an easy task. It turns out it wasn’t. A simple copy/paste will work, but it only grabs the text; if your chat includes any images or emojis (which can be an essential part of the conversation), they get lost in the copy/paste process.

After some creativity, I found a way that preserves the images and results in a printed hard copy or a searchable PDF. Here’s what I did (Note: This was done in the Google Chrome browser):

In Facebook, pull up the chat you want to print/save. In the chat window is a gear icon. Click that, and then select “See Full Conversation.”

FB1

This brings you to your Facebook Messenger page. You can see all the Chats you have in the left hand pane, and the contents of the the chat you have selected in the center pane. In the Chat window (the one in the middle with the conversation you’re interested in), scroll up to the beginning of the chat, or the beginning of the part you want to save/print. If you have a long chat history with this person, this could take a while; you may have to scroll up and wait for messages to load repeatedly.

FB2

Now, you have to select everything you want to print/save; the problem is most of what you want probably isn’t on the screen. You have a couple options here to select the text:

  1. If it’s a smaller amount of text, you can click and drag from the top of the chat window to the bottom. When you get to the bottom, the chat window will start scrolling. Eventually, it will scroll to the bottom and you can release your mouse button and the entire chat will be selected.
  2. If you have a lot of text to select (hundreds, or thousands, or messages), there’s another way. Click and drag to select the first few messages. Then (without clicking to cancel the selection) scroll to the bottom of the chat window. Now hold down the Shift key and click the end of the last message in the chat; this will extend your selection to that click, selecting the entire conversation.

Note: Be sure you only select things within the center conversation pane. If you select anything above or below the chat, you won’t be able to print the selection since the selection will span multiple panes on the webpage. 

Now begin printing the page. You can use File -> Print, or Command/Control + P.

In the Print window there are a couple things you need to change:

  1. If you want to save the conversation as a searchable PDF, you have to change the printer destination to “Save as PDF” (the top arrow pictured below).
  2. You need to click all three check boxes in the Options section (the bottom arrow pictured below).
    1. Headers and footers will give you page numbers (helpful for longer chats).
    2. Background graphics will add the images/emojis (Facebook codes them as background graphics, which normally don’t print)
    3. Selection only will print/save your selection, not what is shown on the screen. This is important since much of what you want to save was not actually on the screen when you started the print command.

FB3

From here, all you have to do is click the blue “Save” button. That said… this could take a while for longer chats. Every time you check the three options boxes Chrome will re-create the preview pane on the right. Let the preview pane load! In my experience, trying to print/save before the preview loads results in bad prints. Be patient, especially if you have a chat with thousands of messages (it could take a while).

When it’s done processing, you will be given a Save dialog window where you can select the name and destination for your PDF.

Once saved you will have a searchable PDF of your Facebook conversation. If you have a long chat, you may want to print/save it in smaller sections.

Lack of Tech PD Isn’t the Problem

It’s so easy to do. We inject technology into classrooms and schools and offer lots of professional development. Time goes by; in some classes it takes, and in other rooms tech integration still struggles. We hear the teachers cry, “we need more tech PD” and we scramble trying to figure out what we missed and how we can create more effective professional development.

IMG_4310But maybe more tech PD isn’t the solution. Or maybe you’ve already offered more tech PD and things haven’t really gotten better. That’s because it’s not a technology problem.

It happens all the time: we put technology into a classroom, things don’t go as planned, and we blame the technology. That must be it, right? Not necessarily. At what point does it stop being a technology problem and start becoming a classroom management problem.

Teaching strategies from 20, 10, even 5 years ago may no longer work. Our students are different, our strategies must change in response. If you take a room with poor classroom management and introduce an educationally disruptive and potentially addictive device, what do you expect to happen? Of course it won’t go well. But that’s not a technology problem, and because of that all the technology PD in the world won’t fix it.

So what do we do?

We need administrators (evaluators) to help out. They need to work with teachers to refine their classroom management skills. If teachers struggle with teaching reading or math we know how to have those difficult conversations about improving. But too often we seem to look the other way when it comes to classroom management, even though it transcends every lesson we teach! We say to ourselves, “everyone is different,” “everyone has their own style.” Yes, that’s true, but some styles are ineffective. And those styles need to change. We’re not doing our students any favors by overlooking these rooms.

If technology integration, if 1:1 environments, are going to be successful we need classrooms with strong classroom management skills. Period.

My district emphasizes the importance of engaging lessons; I agree that’s extremely important to what we do. But engaging technology-filled lessons with poor classroom management will lead to failure every time. And not because the teachers need more tech PD. If we’re going to solve this problem, we need to address the root causes.

photo credit: source via photopin (license)

Starting an Elementary Student Helpdesk

Last year (2014-2015) Kim Lynch (a 5th grade teacher) and I started a Student Helpdesk at our elementary school. The idea was to have a group of trained students who could help with tech-related issues in the building. Here’s how the Helpdesk came to be, and how I hope it will change in the future:

The Vision

Helpdesk working in first grade.

Helpdesk students working in first grade.

The vision was to have a group of students who could help teachers, or other students, or even whole classes when they needed a hand with technology. This could mean them joining me working in a classroom, or they could work without me if I was already teaching in another room.

Since elementary students don’t have study hall, or unscheduled, time this would mean taking them out of class to help out. It was always made clear to teachers that if I wanted to borrow a Helpdesk student from their class, I would seek their permission first. Helpdesk was not meant to be a ticket to get out of class. Each time I would make sure each student was okay academically before taking them. (That said, I definitely believe that when a student helps another student or classroom learn a technological skill, the teaching students learns some valuable skills as well.)

Tech Skills

Since our district is 1:1 with iPads, our skill list is pretty iPad-centric. I developed the list and grouped the skills into categories (most of them correspond to the district’s Foundational Apps). Students came to the computer lab during their recess time to practice the skills, and help each other master them. When they felt they had mastered a category, they would sit with me 1:1 and show me that they could do everything on the list. I kept a running list of who had mastered which apps, so if I needed help with iMovie or Book Creator or Google Drive I could quickly see which students had mastered which apps (and who would be a good student to help out).

On missing recess: Coming to Helpdesk was never required. If it was a nice, sunny day after a week of rain it was fine if kids wanted to be outside. Interestingly (but not entirely surprising), if you look at recess as free time or a way for kids to recharge mid-day, most of the Helpdesk students were just as happy to recharge by learning a new app on the iPad than running around outside. Most mornings I was greeted with, “can we come down at recess today?”

Students

In it’s first year, we hand picked about a dozen fifth graders. Most were boys, which initially we were uncomfortable with. But the more we looked at the specific makeup of that year’s 5th grade class, we felt better about it – it was a group that really didn’t have a lot of tech-interested girls. Looking at the class we had the year before, it would have been a more evenly balanced group simply because it would have been a different population to choose from.

Moving Forward

Changes for the upcoming year:

  • I want to develop an application process. I want a questionnaire so students can tell my why they think they’re a good fit for the Helpdesk (Why do you want to be a part of the Helpdesk? Are you willing to give up recess time? How do you feel about helping younger students or teachers? If you miss work in class, are you willing to make it up on your own, possibly as homework?). I don’t want to hand pick the team again.
  • I want to open it up to both 4th and 5th graders. The idea here being in subsequent years I’ll have a crop of kids in the fall who are already trained (trained as 4th graders, now starting 5th grade). They might be able to help train the new students (if their recesses overlap), but more so we’ll be able to start helping classes as soon as the school year starts.

I’m looking forward to a new and better Student Helpdesk this year.

A Better Way to Cite Images

As my students know, I’m big on permissions. If my students want to use an image in a project, they need to pay attention to Creative Commons licensing. Finding an image that is okay to use isn’t hard (you can search through Creative Commons or change the search tools in Google), but citing it properly is a hassle – especially for my younger elementary students.

Enter Photos For Class (www.photosforclass.com)

Photos For Class searches Flickr and does three great things:

  • Keeps the images G-rated using Flicker’s and their filters
  • Only grabs images licensed for school use under Creative Commons
    and, this is the best part
  • The citation is automatically added to the image

Also, it’s super easy! Enter your search term, find the image you want, click download, and you get an image with an embedded citation – like these:

4743036023

137546658

3564909187

And since the citation is part of the image, no matter where students move the image the citation goes with it. Using properly licensed photos is important, but keeping track of citations can be a headache. Photos For Class is a great solution.

Google and Schools

Yesterday I had the opportunity do attend a teacher PD day at the Google offices in Cambridge, MA. At the end of the day there was a panel of Googlers and one of the questions was, “what do you like best about working for Google?”

The answers were much what you would expect from a company that is often rated as one of the best places to work. Things like:

  • Great people
  • Being connected to current events
  • A culture of collaboration
  • A job where you get to use your brain every
  • A place where nobody ever says, “I can’t help you, that’s not my job.”

This poses the most obvious question: isn’t this what schools are supposed to be like? 

Seriously, if someone asks your teachers why they like their job shouldn’t this be part of their answer too? And if it’s not, why? And how do you start changing that?

Looking for 1:1 Success? You Need Ubiquity!

ipad_paper
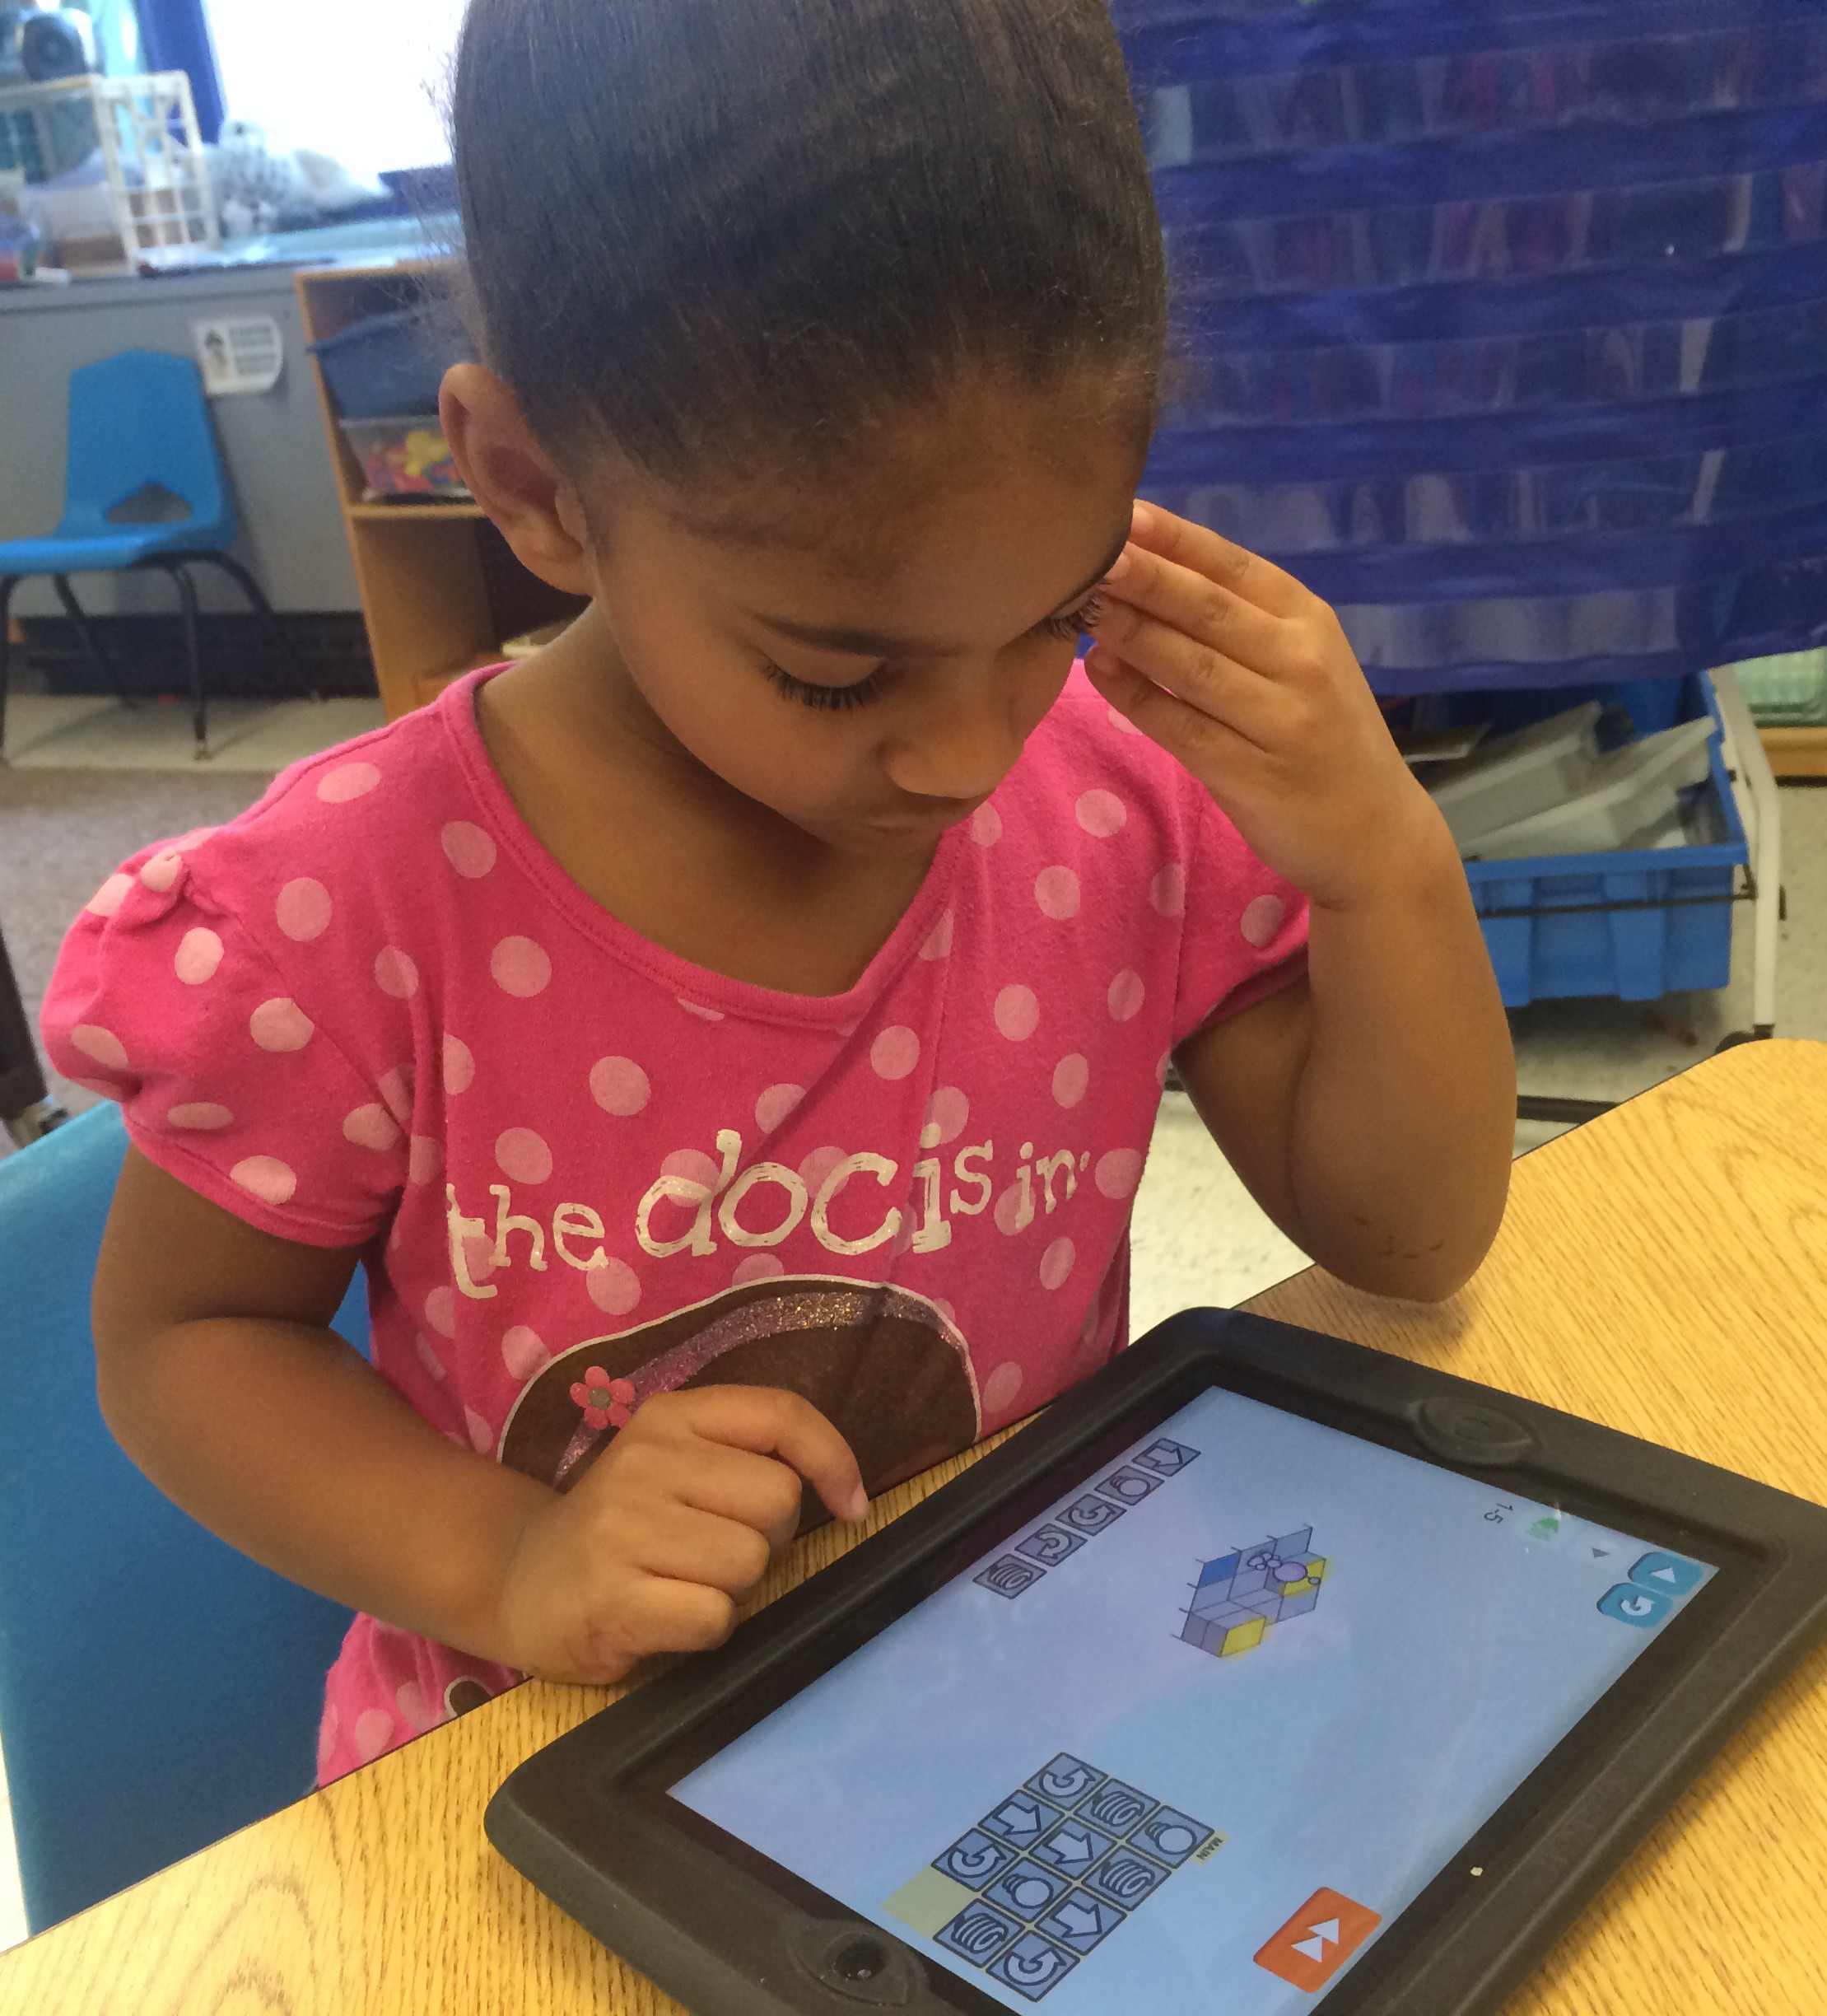
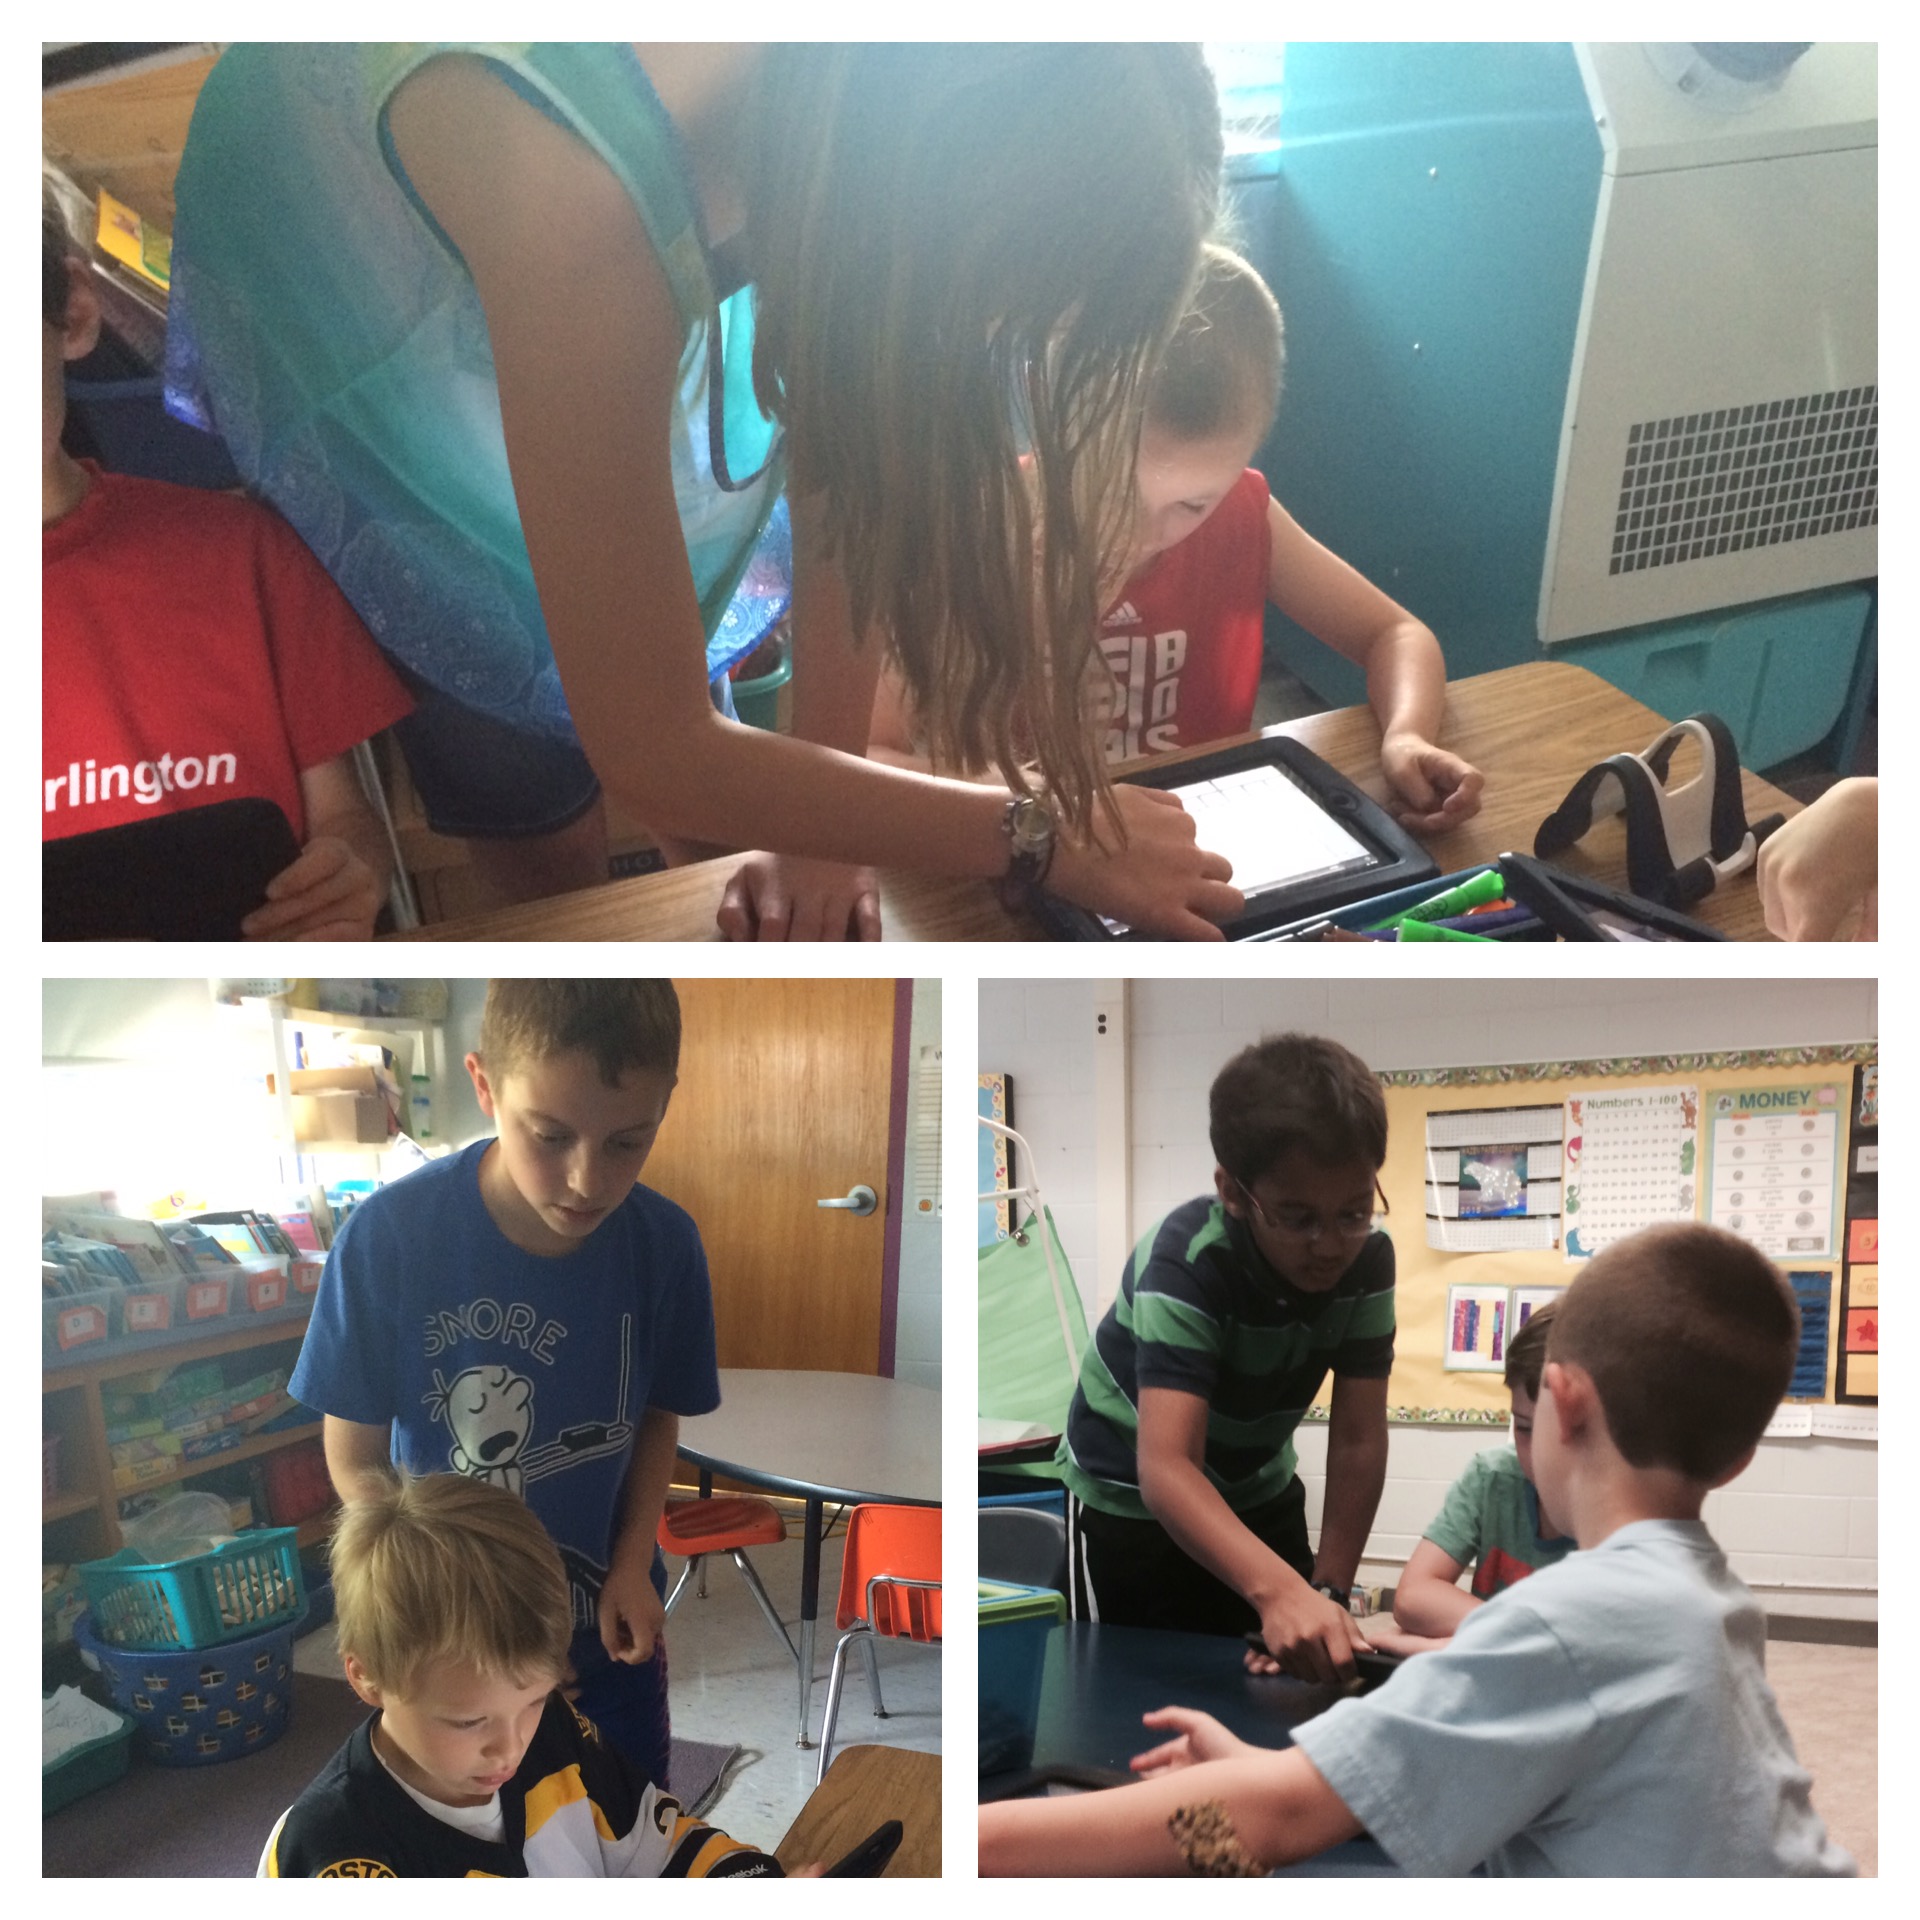
There are lots of things that will make a 1:1 environment (iPads, Chromebooks, laptops, BYOD, etc.) successful, but without ubiquity you won’t find success. If you’re going to go 1:1 technology can’t be an extra thing, it has to permeate everything.

Think about it like this, the iPad is an educational tool. You wouldn’t hide your constructions paper or scissors or makers away and only get them out for special projects (I hope). If you do, that Social Studies project starts to become a construction paper and scissors project; the project becomes about the tool not the content.

The same is true for technology. If you keep it away and only get it out for a limited number of specific activities, that Science project starts to become a technology project.

If you want students to use technology effectively they need lots of practice. If they’re working in a content area you want them focusing their energy on the content, not how to use the tool (technology).

Sure, there are times when you want to unplug. I’m not suggesting that we go all-technology all-the-time, but if you want success the tool needs to be available as much as possible – like all their other school supplies/tools (construction paper, scissors, markers).

Creating a Google Custom Search Engine

Teaching students how to search effectively is essential. But letting an elementary student loose on Google makes a lot of people nervous (which is okay). School filters are good, but they aren’t perfect (which is also okay, but that’s another post altogether). A Google Custom Search Engine is a great compromise. It allows students to use the Google search engine, but it also allows you to limit the webpages and websites that are used for the results. And best of all, creating a Custom Search Engine is easy.

First, head over to www.google.com/cse.

Look for the blue botton that says, “Create custom search engine.”

Screenshot 2015-01-08 at 10.39.58 AM

If you’re not logged into a Google account, the blue button will ask you to sign in first.

Second, you need to add the websites you want your Custom Search Engine to use. Every time you add a new site, an additional box will appear for you to add another. In my example I’ve added some sites with good information on planets.

Screenshot 2015-01-08 at 10.43.24 AM

Next, you name the search engine.

Screenshot 2015-01-08 at 10.43.40 AM

Finally, find the blue “Create” button.

That’s it! It’s ready to go. You just need to get your students to the search page.

Screenshot 2015-01-08 at 10.44.34 AM

Here Google gives you three options – you can:

  1. Get code – if you want to embed your search engine in a webpage. Google will give you some javascript you can plug into a webpage.
  2. Public URL – if you want to have students navigate to your search engine. It’s a long URL so you’ll want to find a way for students to not type it all in (email it, put the link on a webpage, make a qr code, etc.)
  3. Access the Control Panel – if you want to go back and change the sites that your custom search engine uses.

When I go to the link for my Planets Custom Search Engine (the link is: https://www.google.com/cse/publicurl?cx=017140682098558138880:20oohmnfel4, I wasn’t kidding when I was long), the search page looks like this:

Screenshot 2015-01-08 at 10.46.01 AM

And when I search for neptune atmosphere I get this (only results from the sites I specified):

Screenshot 2015-01-08 at 10.47.36 AM

Note: If a student follows one of the search results, and then follows a link from within that page, they can access the rest of the web. The Custom Search Engine only limits the results of the search; it doesn’t block students from following links to other sites.

Searching is an important skill. If you can’t find what you’re looking for in the first page of your search results, you’re using the wrong search terms. But keeping our students safe while they explore this is important too.

From XKCD